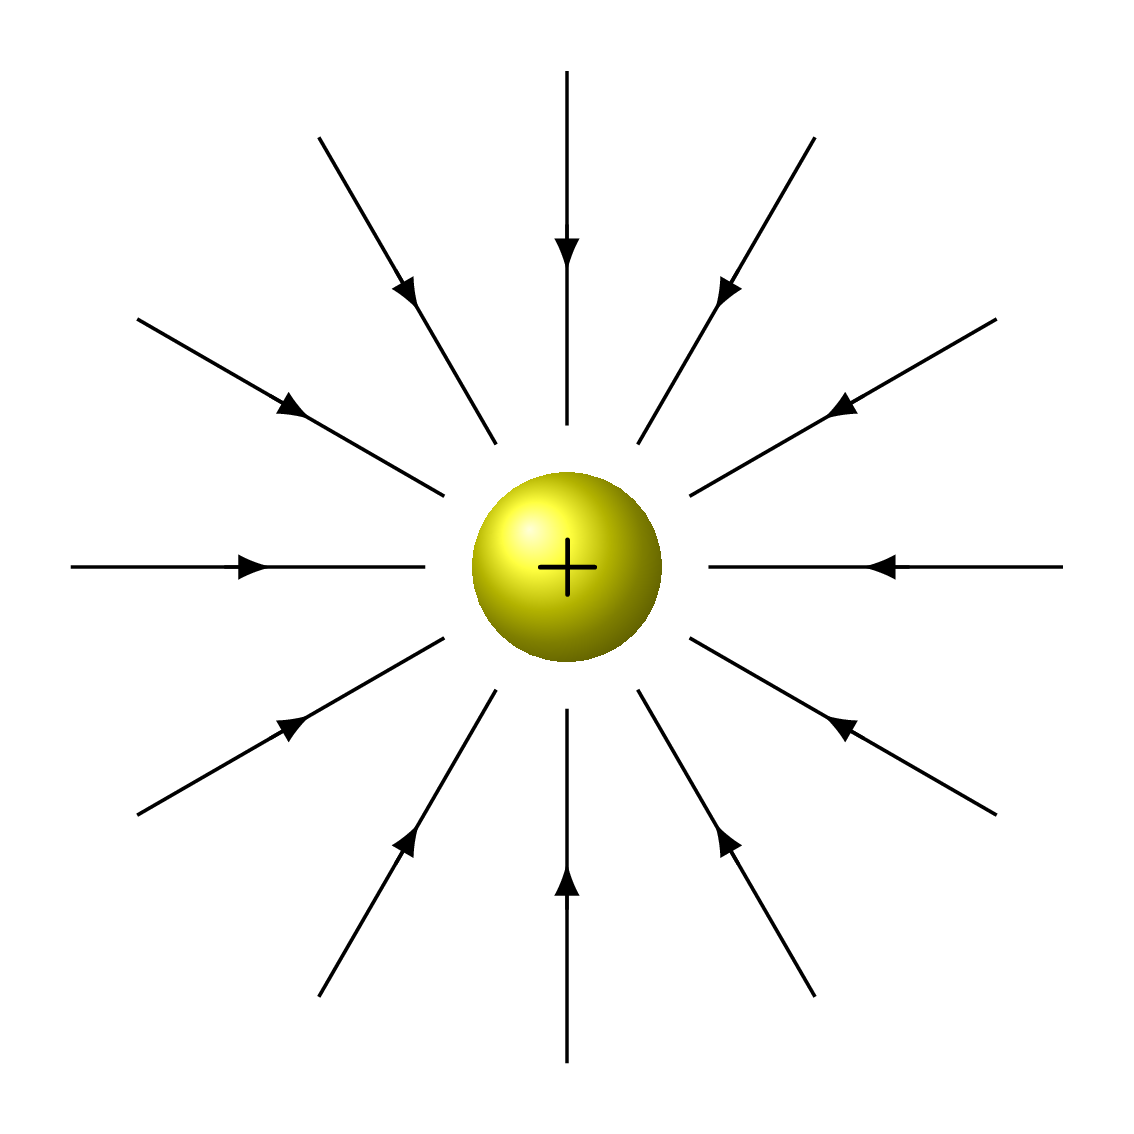
There are several methods that can be used to draw an arrow in the middle or at predefined position of a line. In this short post, we will highlight three methods and it's up to you to choose one of them.
Method 1: based on CircuiTikZ
This method benefits from the currarrow option provided by CircuiTikZ package, which is used for voltage and current arrows. Here is a simple code with different options:
 \documentclass[border=0.2cm]{standalone}

\usepackage{circuitikz}

\begin{document}

\begin{tikzpicture}

\draw (0,0) -- (2,2) node[
	currarrow,
	pos=0.5,
	xscale=-1,
	sloped,
	scale=2] {};
\end{scope}

\end{tikzpicture}

\end{document}

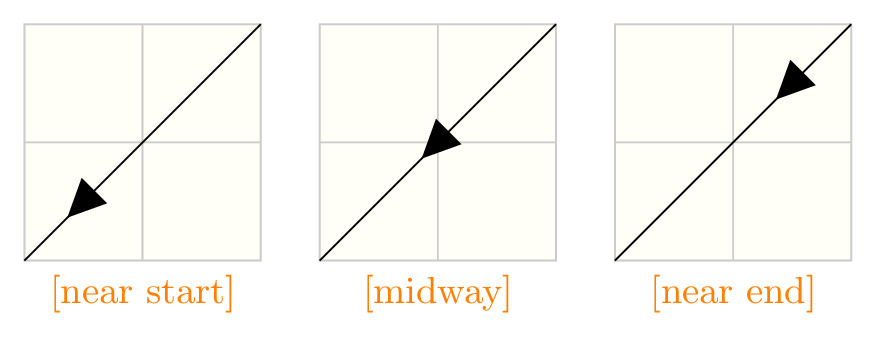
Comments:
- currarrow is a node option;
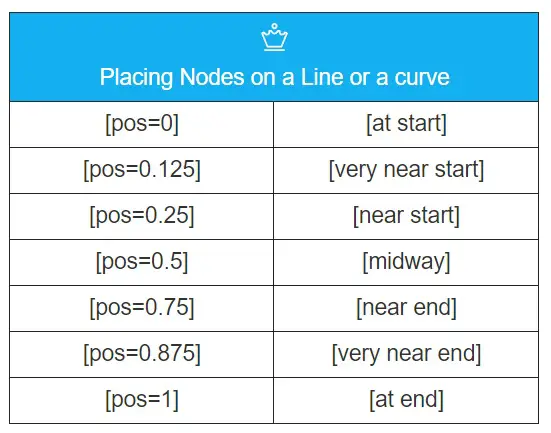
- pos=0.5: sets the position of the arrowhead along the path. It takes values from 0 (start of the path) to 1 (end of the path). We can use also predefined positions: at start, very near start, near start, midway, near end, very near end and at end. Check the next table to get the precise position of each one.
- xscale=-1: this trick is used to define the arrow direction, you should choose between 1 and -1.
- sloped: it forces the arrow to follow the path slope at the predefined position.
- scale=2: it can be used to scale the arrowhead and change its size.
Remark: These options can be used to position a node with any content (e.g. label, image, etc) and not limited to this case. For more details, check Placing Nodes on a Line or Curve Explicitly in the PGFmanual.
Method 2: based on decorations library
Despite the fact that the previous method is easy to implement, it is not flexible specially with curved lines. Moreover, it requires loading a full package for only an arrowhead option that can be achieved with one line code.
This method, I recommend, is based on decorations.markings library, which allows us to add a marking on a path with a specific position. A marking is not limited to an arrow tip, it can be a node or even a whole picture. Furthermore, we can add a marking repeatedly along a path with a specific distance.
Here is an illustrative example:
 \documentclass[border=0.2cm]{standalone}

\usepackage{tikz}
\usetikzlibrary{ decorations.markings}

\begin{document}

\begin{tikzpicture}
[decoration={markings,
	mark= at position 0.25 with {\arrow{stealth}},
	mark= at position 2cm with {\arrow{stealth}}}
]

\draw [postaction={decorate}] (0,0) -- (2,2);

\end{tikzpicture}

\end{document}
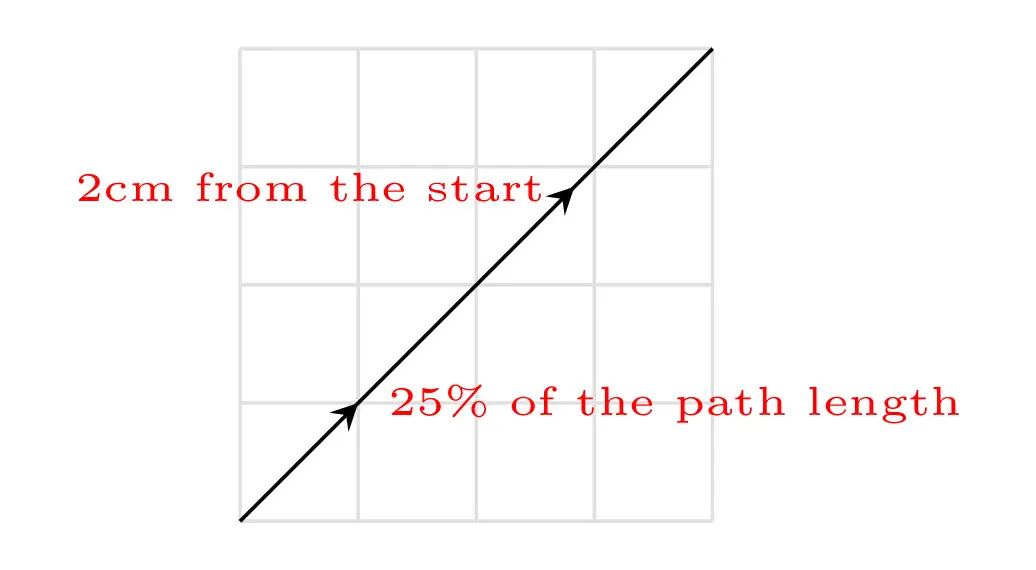
In this example, we draw a straight line from (0,0) to (2,2) using the \draw command. We have added the option postaction={decorate} to decorate the path with the previously defined markings. The latter are defined by the key decoration={options} used with the tikzpicture environment.
The mark decoration option is used to specify a marking (arrowhead in this case) in two different positions along the path:
- dimensionless non-negative number: it sets the marking at a position relative to the path length, 0.25 means put the arrowhead at 25% of the path.
- non-negative dimension number: it puts the arrowhead at a given distance (2cm) from the start point of the path in question.
If you consider negative values of the above options, then the positioning will be from the end point of the path and not the start point.
Here is another illustrative example (repeated arrows):
\documentclass[border=0.2cm]{standalone}

\usepackage{tikz}
\usetikzlibrary{ decorations.markings}

\begin{document}

\begin{tikzpicture}
[decoration={markings,
	mark= between positions 0.25 and 0.75 step 2mm
		with {\arrowreversed{latex}}}
]

\draw [postaction={decorate}] (0,0) -- (2,2);

\end{tikzpicture}

\end{document}
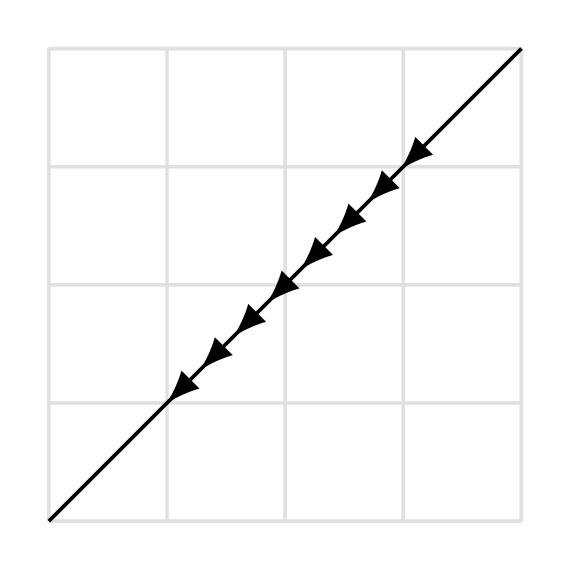
The above code draws repeated arrows, with a step of 2mm, between the positions 0.25 and 0.75 of the path length.
In this case, we used \arrowreversed{} instead of \arrow{} to invert the direction of the arrow tip. You may remarked that we have changed the arrow tip, we used latex tip instead of stealth tip. For more details, I invite you to check the PGF package manual.
Method 3: TikZ code inside a node
The basic idea is to create a TikZ code for the arrow and include it in a node along your path. Here is an illustrative example:
\documentclass[border=0.2cm]{standalone}

\usepackage{tikz}

% create an arrow
\newcommand{\arrowIn}{
\tikz \draw[-stealth] (-1pt,0) -- (1pt,0);
}

\begin{document}

\begin{tikzpicture}

\draw (0,0) -- (2,2) node[
	sloped,
	pos=0.5,
	allow upside down]{\arrowIn}; ;

\end{tikzpicture}

\end{document}
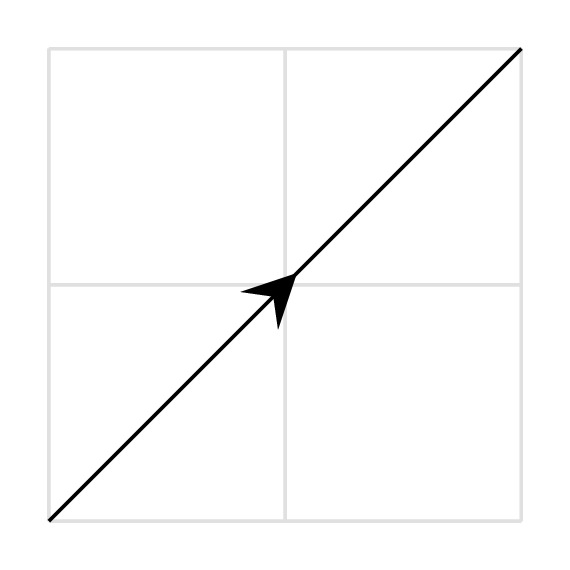
We created a new command, \arrowIn, that mainly draws an arrow with a tip style -stealth. This command is used inside a node where the same options of method 1 can be used. It should be noted that we added the option allow upside down to force the arrow direction to follow the path flow. Without this option, if we draw the same path but from (2,2) to (0,0) then we get the same arrow direction as above. This also has to be added to method 1 (no need to add it in method 2).
Conclusion: To be honest, I used to use method 3 as it allows me to control everything in my code. Well, I am lazy to go back to the wonderful manual and read more 

1 thought on “How to draw an arrow in the middle of a line in TikZ?”
Comments are closed.