Isosceles Triangle shape in TikZ
A triangle node shape can be created by providing the option isosceles triangle to the \node command. The following line code creates a triangle node named (T) at the point with coordinates (0,0):
 \documentclass[border=0.2cm]{standalone}

\usepackage{tikz}
\usetikzlibrary{shapes.geometric}

\begin{document}


\begin{tikzpicture}

\node[isosceles triangle,
	draw,
	fill=cyan!30,
	minimum size =3cm] (T)at (0,0){};

\end{tikzpicture}

\end{document}
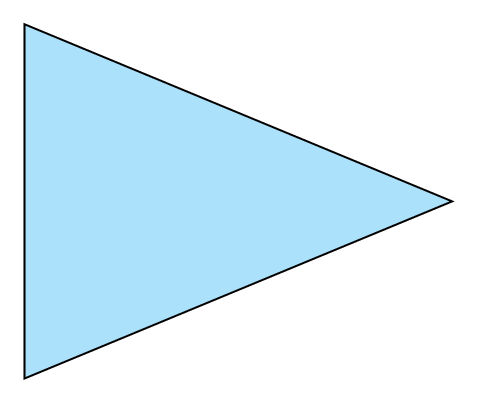
We added draw option in order to draw the node shape, fill=cyan!30 to change the filling color of the triangle and minimum size=3cm to change its size.
Apex angle of Isosceles triangle
Providing isosceles triangle to the node command will create an isosceles triangle with apex angle equals to 30 degrees by default. The latter can be easily changed by providing the option isosceles triangle apex angle=<value>. Here is an example:
 \documentclass[border=0.2cm]{standalone}

\usepackage{tikz}
\usetikzlibrary{shapes.geometric}

\begin{document}


\begin{tikzpicture}

% Default apex angle 30 degrees
\node[isosceles triangle,
	draw,
	fill=teal!30,
	minimum size =2cm] (T30)at (0,0){};

% Apex angle 60 degrees
\node[isosceles triangle,
	isosceles triangle apex angle=60,
	draw,fill=teal!60,
	minimum size =2cm] (T60)at (3,0){};

% Apex angle 90 degrees
\node[isosceles triangle,
	isosceles triangle apex angle=90,
	draw,
	fill=teal!90,
	minimum size =2cm] (T90)at (6,0){};

\end{tikzpicture}

\end{document}
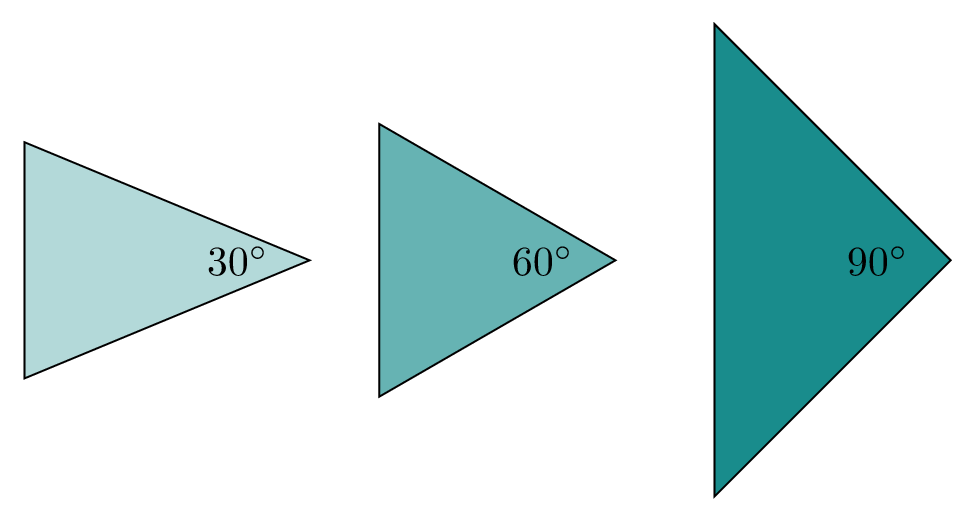
Rotate Isosceles triangle in TikZ
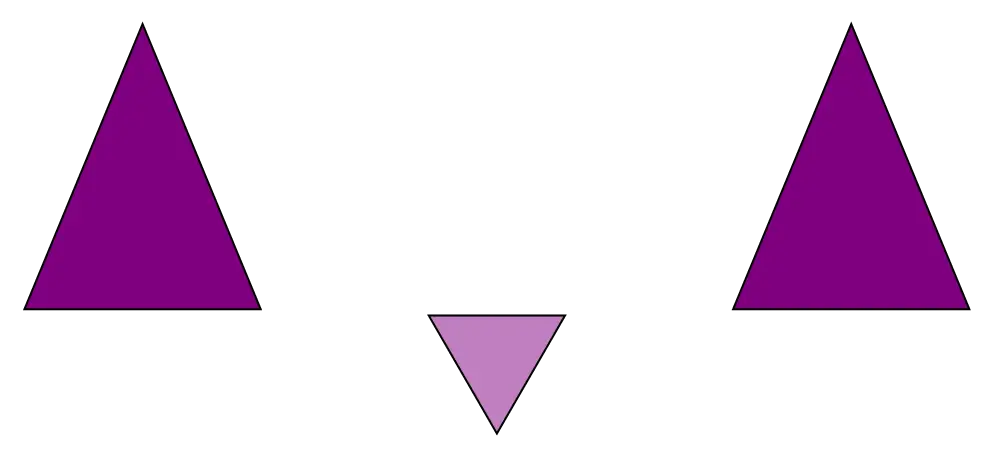
Rotating the Isosceles triangle can be achieved by adding rotate=<value> to the node command. Here is an example:
 \documentclass[border=0.2cm]{standalone}

\usepackage{tikz}
\usetikzlibrary{shapes.geometric}

\begin{document}


\begin{tikzpicture}

% 90 degrees rotation
\node[isosceles triangle,
	draw,
	rotate=90,
	fill=violet,
	minimum size =2cm] (T1)at (0,0){};


% 270 degrees rotation
\node[isosceles triangle,
	isosceles triangle apex angle=60,
	draw,
	rotate=270,
	fill=violet!50,
	minimum size =1cm] (T2)at (3,-1){};

% 90 degrees rotation
\node[isosceles triangle,
	draw,
	rotate=90,
	fill=violet,
	rotate=90,
	minimum size =2cm] (T)at (6,0){};

\end{tikzpicture}

\end{document}
which yields the following illustration:
Isosceles triangle anchors
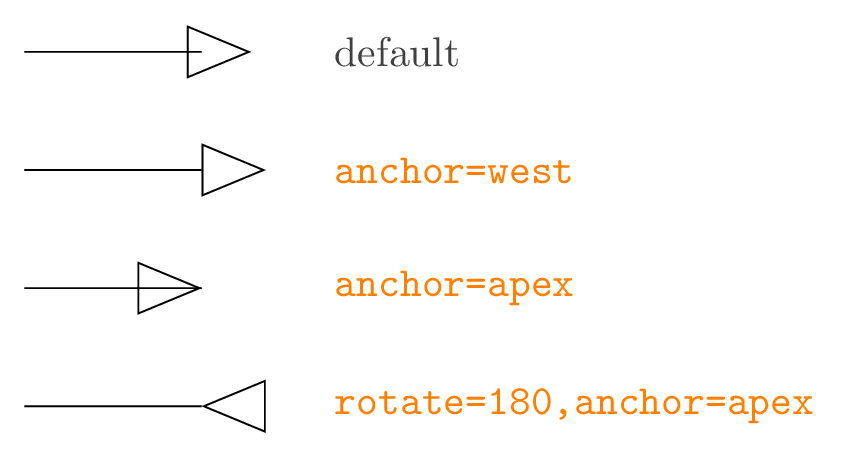
The advantage of using a node triangle shape is that it defines a set of anchors that we can use them to get coordinates of the node border or to position nodes with accuracy with respect to given coordinates. By default, node center is positioned at the provided coordinates( (0,0) for previous examples).
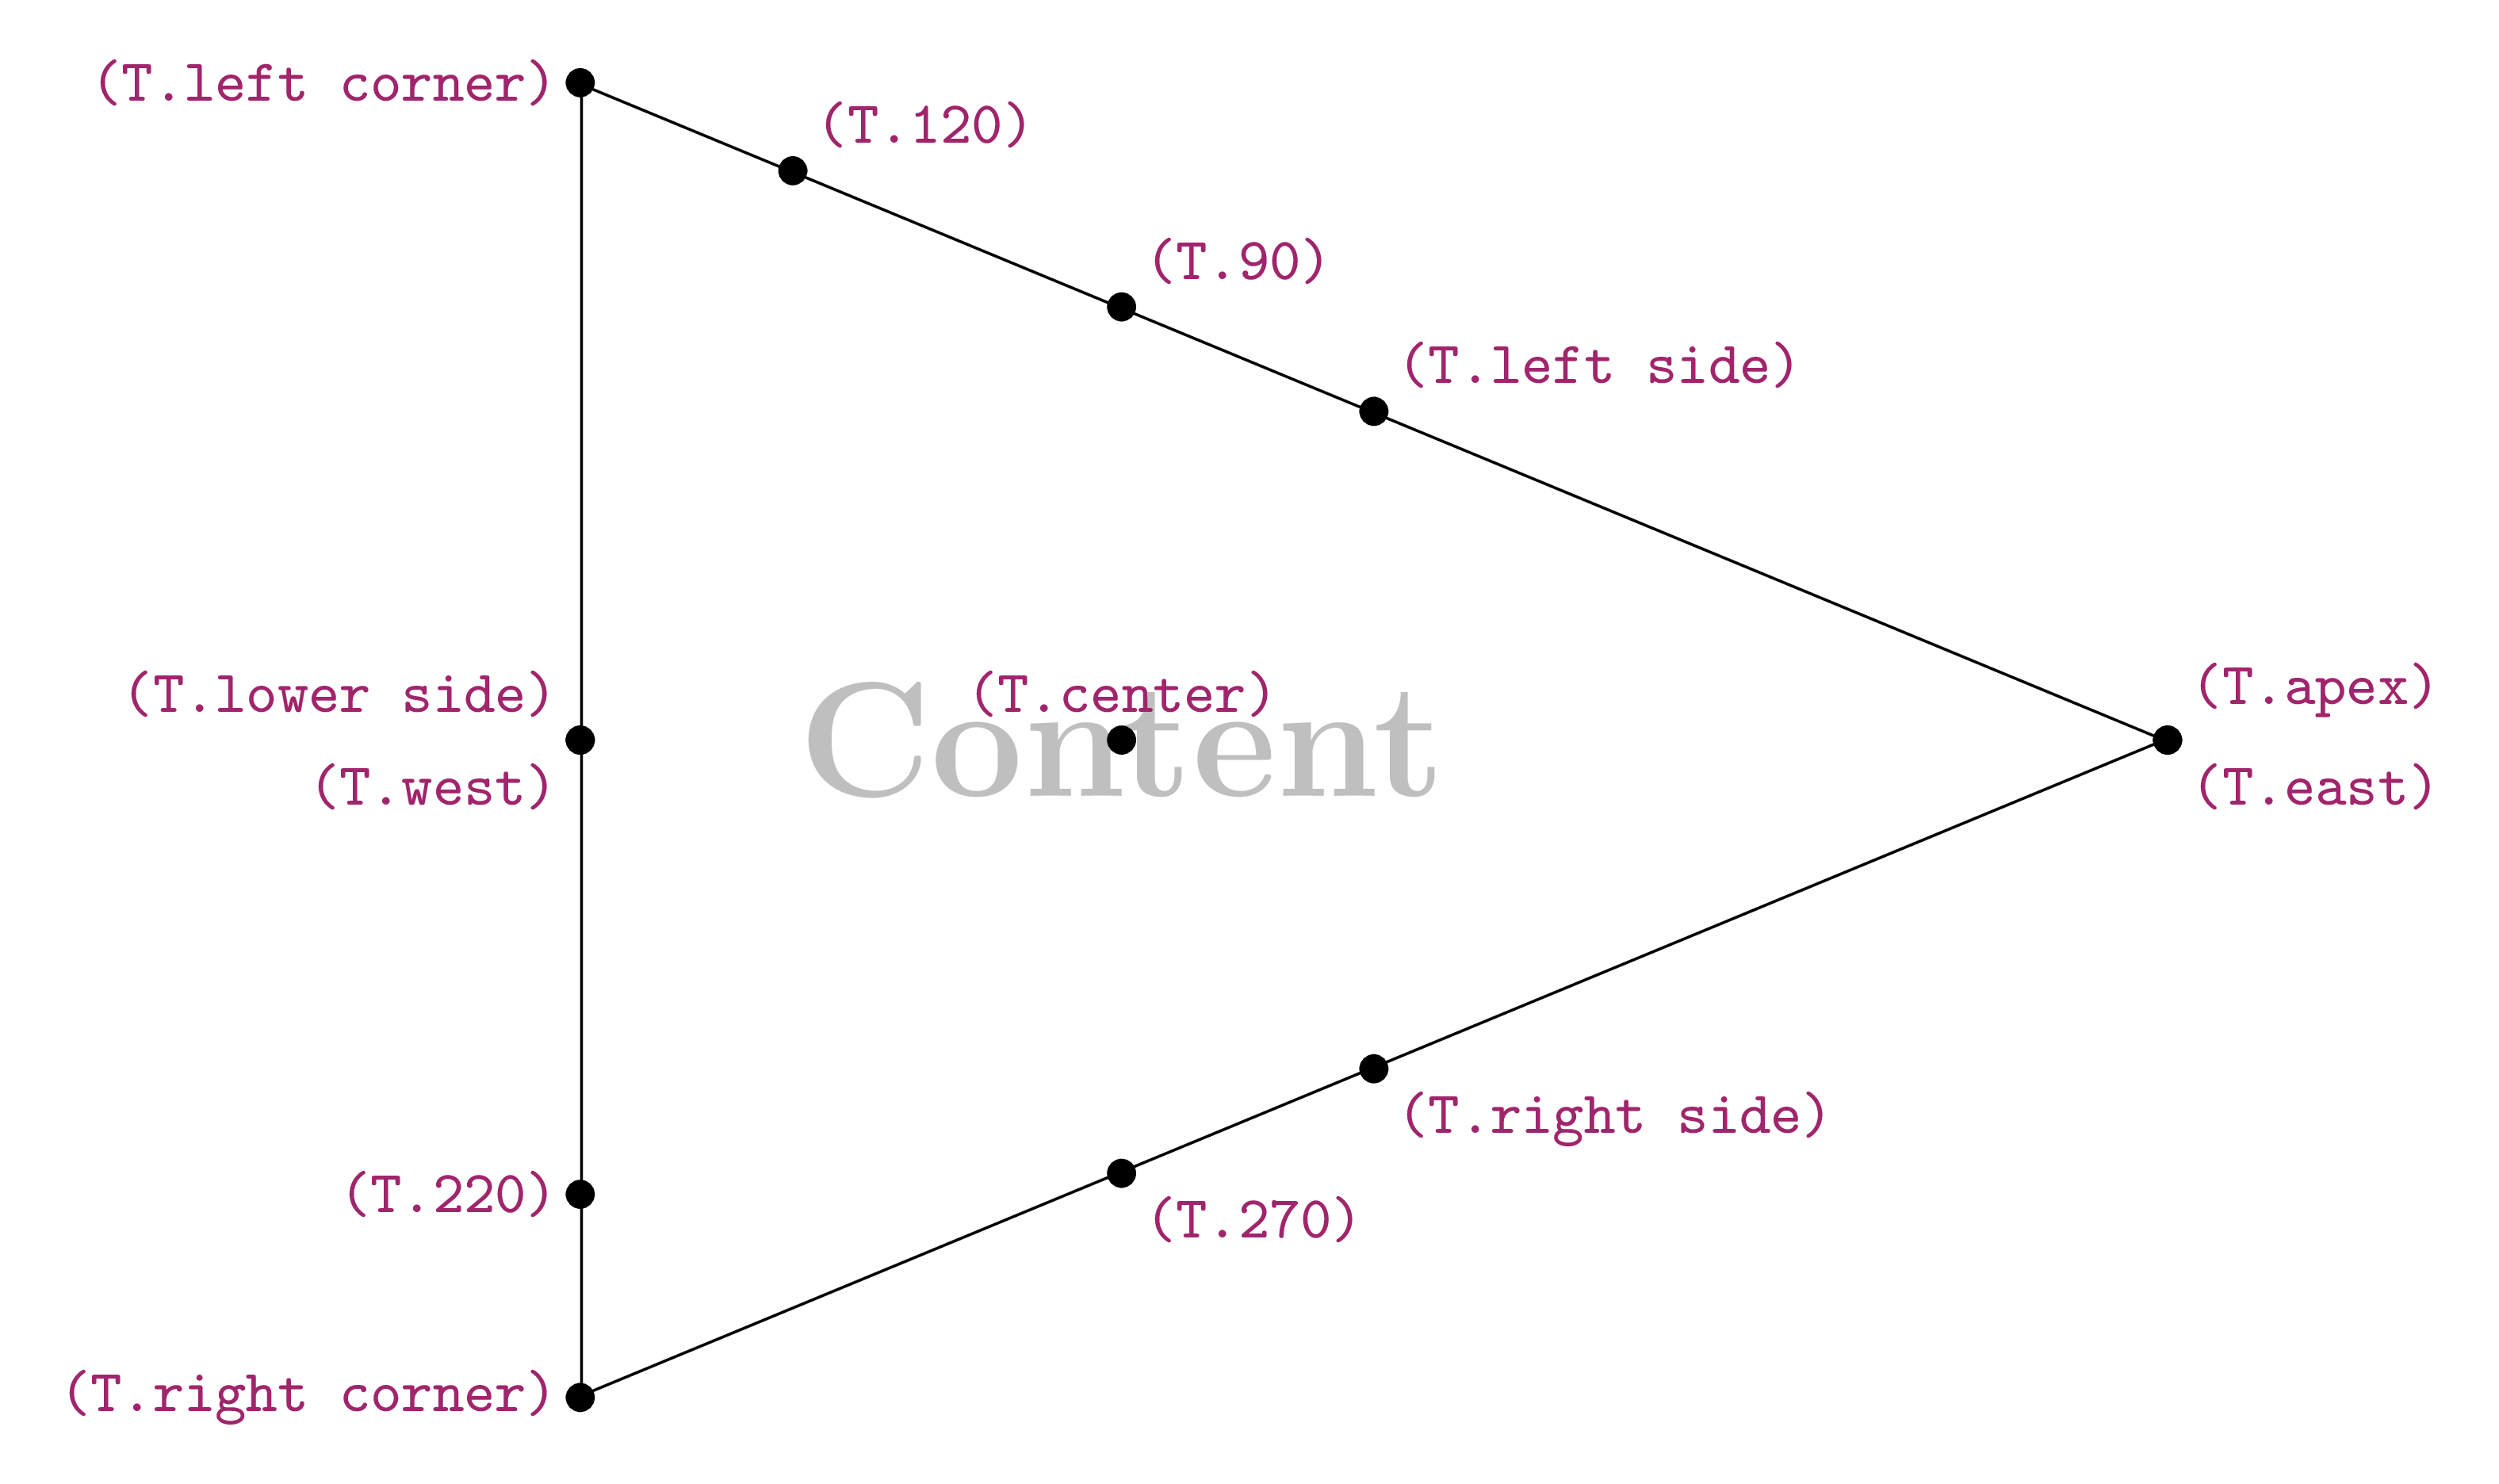
The above triangle node is named (T) and (T.apex), (T.right corner) and (T.left corner) are the triangle vertices' coordinates. We can also use angles where (cT.180) is the coordinates of the point located at the west of the triangle node.
 \documentclass[border=0.2cm]{standalone}

\usepackage{tikz}
\usetikzlibrary{shapes.geometric}

\begin{document}


\begin{tikzpicture}

% Default positioning
\draw (0,0) -- (1.5,0)
	node[draw,isosceles triangle]{};

% West anchor positioning
\draw (0,-1) -- (1.5,-1)
	node[draw,isosceles triangle,anchor=west]{};

% Apex anchor positioning
\draw (0,-2) -- (1.5,-2)
	node[draw,isosceles triangle,anchor=apex]{};

% Apex + rotation anchor positioning
\draw (0,-3) -- (1.5,-3)
	node[draw,isosceles triangle,anchor=apex,rotate=180]{};

\end{tikzpicture}

\end{document}
Here is the corresponding TikZ illustration:
TikZ Example: rotated triangle
The following illustration corresponds to a set of rectangles rotated with increased size. This is achieved using only one \foreach loop. Check the code below!
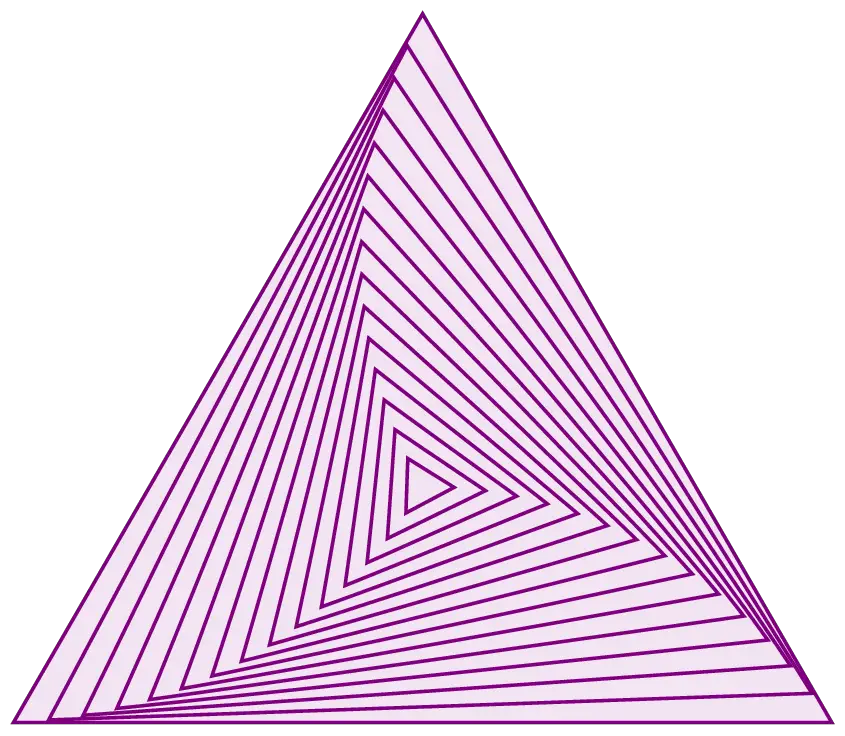
Here is the code of the above illustration:
 \documentclass[border=0.2cm]{standalone}
\usepackage{tikz}
\usetikzlibrary{shapes.geometric}

\begin{document}

\begin{tikzpicture}[thick,violet]
\foreach \i in {-30,-28,...,0}{

\node[draw,
	fill=violet!10,
	isosceles triangle,
	isosceles triangle apex angle=60,
	minimum size=-2*\i mm,
	rotate=\i,inner sep =0pt] at (0,0){};
}

\end{tikzpicture}

\end{document}
