Packages and Libraries
The spring mass system that we would like to create in TikZ is shown below. Mainly, it has three parts: 1) the support, 2) the spring and 3) the mass.
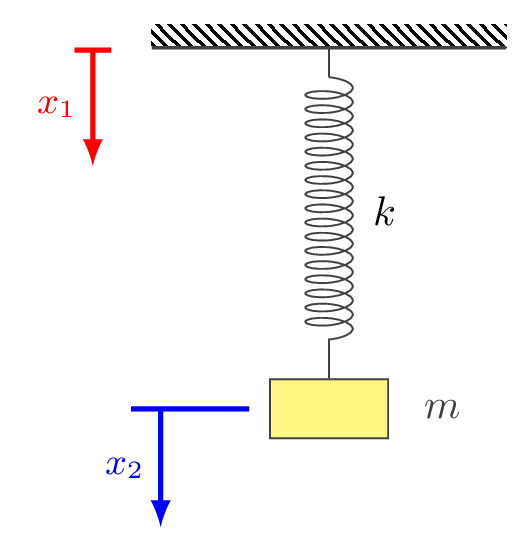
We need to load TikZ as it's the main drawing package. We need patterns which is a TikZ library for the support. In addition, we need to load decorations.pathmorphing which is also a TikZ library for drawing the spring!
Step 1: draw the support
The support corresponds to a rectangle shape filled with north west lines pattern.
Details: Let's consider a rectangle of 3cm width and 0.2cm height. The rectangle has no border and filled with north west lines pattern. We will add a thick line at the bottom side of the rectangle to get the following illustration:

and here is the corresponding LaTeX code:
\documentclass[border=0.2cm]{standalone}

% Required package and libraries
\usepackage{tikz}
\usetikzlibrary{decorations.pathmorphing,patterns}

\begin{document}


\begin{tikzpicture}[black!75,thick]

% Supporting structure
\fill [pattern = north west lines] (-1.5,0) rectangle ++(3,.2);
\draw[thick] (-1.5,0) -- ++(3,0);

\end{tikzpicture}

\end{document}
Step 2: draw the spring
As mentioned above, the spring can be drawn using decorations.pathmorphing library. Check the following line code which highlights different coil shape options:
\draw
[
	decoration={
		coil,
		segment length = 1mm,
		amplitude = 2mm,
		aspect = 0.5,
		post length = 3mm,
		pre length = 3mm},
	decorate] (0,0) -- ++(0,-2.5)
Coil options
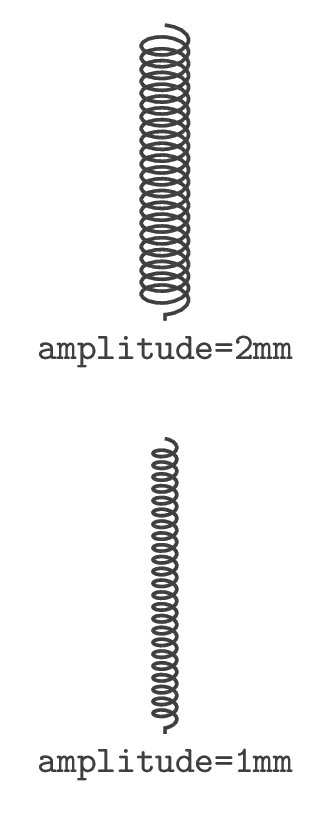
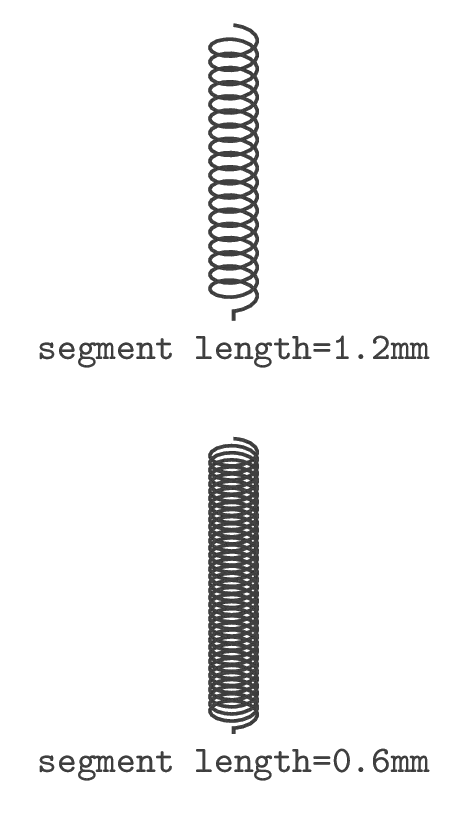

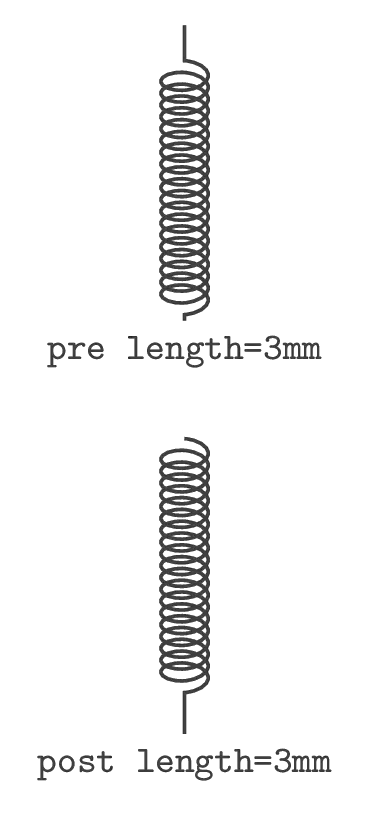
Details: In our case, we will draw the coil from (0,0) to (0,-3) with the following parameters:
- aspect=0.3,
- segment length=1.2mm,
- amplitude=2mm,
- pre length=3mm,
- post length=3mm
Here is the corresponding code:
\documentclass[border=0.2cm]{standalone}

% Required package and libraries
\usepackage{tikz}
\usetikzlibrary{decorations.pathmorphing,patterns}

\begin{document}


\begin{tikzpicture}[black!75,thick]

% Supporting structure
\fill [pattern = north west lines] (-1.5,0) rectangle ++(3,.2);
\draw[thick] (-1.5,0) -- ++(3,0);

% Spring
\draw
[
	decoration={
		coil,
		aspect=0.3,
		segment length=1.2mm,
		amplitude=2mm,
		pre length=3mm,
		post length=3mm},
	decorate
] (0,0) -- ++(0,-3)
	node[midway,right=0.25cm,black]{$k$};

\end{tikzpicture}

\end{document}
Compiling this code yields:
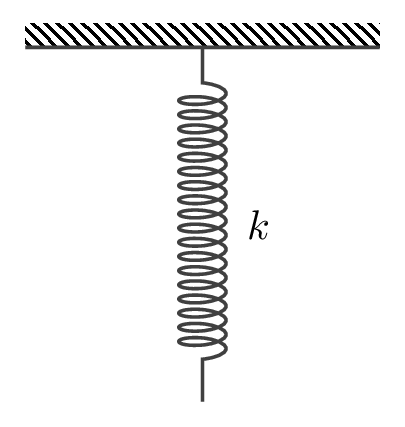
We have added a text node to the right of the middle point of the spring.
Step 3: draw the mass
The mass corresponds to a rectangle filled with yellow color and has a label m. We will draw it using rectangle node shape (more details). Here is the corresponding LaTeX code:
\documentclass[border=0.2cm]{standalone}

% Required package and libraries
\usepackage{tikz}
\usetikzlibrary{decorations.pathmorphing,patterns}

\begin{document}


\begin{tikzpicture}[black!75,thick]

% Supporting structure
\fill [pattern = north west lines] (-1.5,0) rectangle ++(3,.2);
\draw[thick] (-1.5,0) -- ++(3,0);

% Spring
\draw
[
	decoration={
		coil,
		aspect=0.3,
		segment length=1.2mm,
		amplitude=2mm,
		pre length=3mm,
		post length=3mm},
	decorate
] (0,0) -- ++(0,-3)
	node[midway,right=0.25cm,black]{$k$};

% Mass
\node[draw,
	fill=yellow!60,
	minimum width=1cm,
	minimum height=0.75cm,
	anchor=north,
	label=east:$m$] at (0,-3) {};

\end{tikzpicture}

\end{document}
Compiling this code yields:
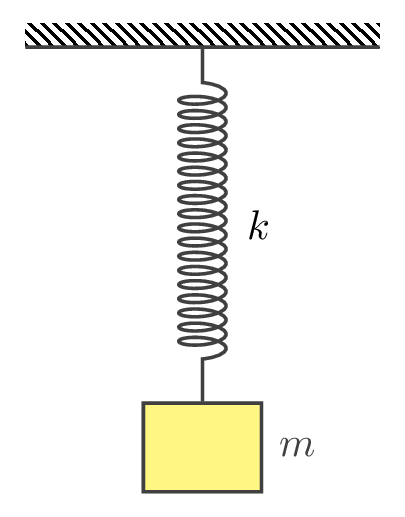
Comments:
- The node by default has a rectangle shape that can be highlighted by adding draw option (draws the node shape border).
- fill=yellow!60: adds a light yellow color to the rectangle shape
- minimum width and minimum height sets the minimum size of the rectangle.
-anchor=north: by default the node center will be positioned on the provided coordinates (0,-3). Adding this option will position the top of the rectangle on the coordinates (0,-3). More details can be found in the tutorial: draw a rectangle in TikZ.
- label=east:$m$ : adds the text label $m$ on the right of the node shape.
Spring Mass system LaTeX code
Here is the final LaTeX code of a simple spring mass system in TikZ. We have added arrows to the previous code and for more details you can check the post: TikZ arrows.
\documentclass[border=0.2cm]{standalone}

% Required package and libraries
\usepackage{tikz}
\usetikzlibrary{decorations.pathmorphing,patterns}

\begin{document}


\begin{tikzpicture}[black!75,thick]

% Supporting structure
\fill [pattern = north west lines] (-1.5,0) rectangle ++(3,.2);
\draw[thick] (-1.5,0) -- ++(3,0);

% Spring
\draw
[
	decoration={
		coil,
		aspect=0.3,
		segment length=1.2mm,
		amplitude=2mm,
		pre length=3mm,
		post length=3mm},
	decorate
] (0,0) -- ++(0,-3)
	node[midway,right=0.25cm,black]{$k$};

% Mass
\node[draw,
	fill=yellow!60,
	minimum width=1cm,
	minimum height=0.75cm,
	anchor=north,
	label=east:$m$] at (0,-3) {};

% x1 arrow
\draw[very thick,
	red,
	|-latex] (-2,0) -- ++(0,-1)
	node[midway,left]{\small $x_1$};

% x2 arrow
\draw [very thick,
	blue,
	-latex
] (-0.8,-3.4) -- ++(-1,0) ++(0.25,0) -- ++ (0,-1)
	node[midway,left]{\small $x_2$};

\end{tikzpicture}

\end{document}

Extension of the spring Mass system
