
Which Library should I use?
In this post, we will consider two kinds of braces :

A simple curly brace can be used by loading the library decorations.pathreplacing together with the TikZ package as follows:
% Required packages and libraries
\usepackage{tikz}
\usetikzlibrary{decorations.pathreplacing}
For the calligraphic curly brace, we need to load the library calligraphy in addition to the previous ones:
% Required packages and libraries
\usepackage{tikz}
\usetikzlibrary{decorations.pathreplacing,calligraphy}
How to draw curly brackets in TikZ?
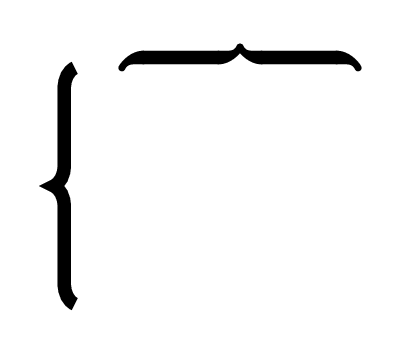
Using draw command, the curly brackets are drawn from the starting point of the path to the end point. We should add decorate option and specify the type of braces in decoration (brace or calligraphic brace). Here is an illustrative example:
\documentclass[border = .2cm]{standalone}

% Required packages and libraries
\usepackage{tikz}
\usetikzlibrary{decorations.pathreplacing,calligraphy}

\begin{document}

\begin{tikzpicture}[ultra thick]

% Simple brace
\draw [decorate,
	decoration = {brace}] (0,0) --  (0,1);

% Calligraphic brace
\draw [decorate,
	decoration = {calligraphic brace}] (0.2,1) --  (1.2,1);

\end{tikzpicture}

\end{document}
Compiling this code yields:
- Mirror option
We can change braces orientation by either drawing from (0,1) to (0,0) for simple brace and (1.2,1) to (0.2,1) for calligraphic brace, or simply adding mirror option to the decoration set. Here is the obtained result:
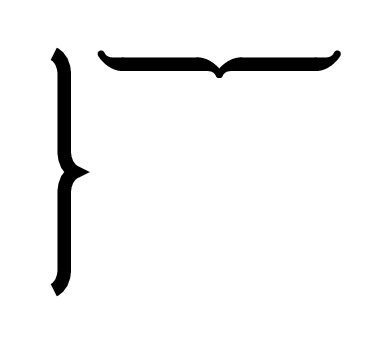
and here is the modified code:
\documentclass[border = .2cm]{standalone}

% Required packages and libraries
\usepackage{tikz}
\usetikzlibrary{decorations.pathreplacing,calligraphy}

\begin{document}

\begin{tikzpicture}[ultra thick]

% Simple brace
\draw [decorate,
	decoration = {brace,mirror}] (0,0) --  (0,1);

% Calligraphic brace
\draw [decorate,
	decoration = {calligraphic brace,mirror}] (0.2,1) --  (1.2,1);

\end{tikzpicture}

\end{document}
- Raise option
We can put a space between the brace and its original position adding raise attribute to the decoration set. Here is an example of braces raised by 5pts from the drawing path:
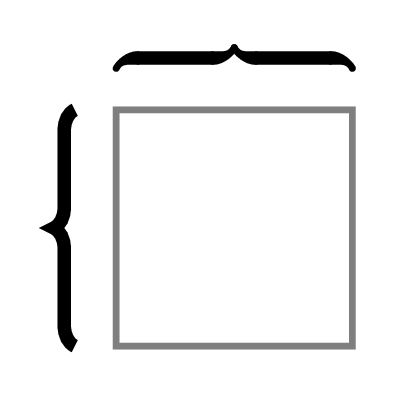
With the corresponding LaTeX code:
\documentclass[border = .2cm]{standalone}

% Required packages and libraries
\usepackage{tikz}
\usetikzlibrary{decorations.pathreplacing,calligraphy}

\begin{document}

\begin{tikzpicture}[ultra thick]

% Gray rectangle
\draw[thick,gray] (0,0) rectangle (1,1);

% Simple brace
\draw [decorate,
	decoration = {brace,raise=5pt}] (0,0) --  (0,1);

% Calligraphic brace
\draw [decorate,
	decoration = {calligraphic brace,raise=5pt}] (0,1) --  (1,1);

\end{tikzpicture}

\end{document}
- Aspect option
We can also change where the tip of the brace will be using aspect option. It takes values between 0 and 1, 0 being where the brace starts and 1 points to where it ends. By default, the tip stands at 0.5, the midway of the brace. Here is an illustrative example:
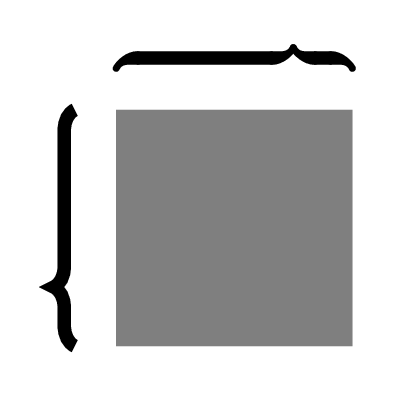
With the corresponding LaTeX code:
\documentclass[border = .2cm]{standalone}

% Required packages and libraries
\usepackage{tikz}
\usetikzlibrary{decorations.pathreplacing,calligraphy}

\begin{document}

\begin{tikzpicture}[ultra thick]

% Gray rectangle
\fill[gray] (0,0) rectangle (1,1);

% Simple brace
\draw [decorate,
	decoration = {brace,
		raise=5pt,
		aspect=0.25}] (0,0) --  (0,1);

% Calligraphic brace
\draw [decorate,
	decoration = {calligraphic brace,
		raise=5pt,
		aspect=0.75}] (0,1) --  (1,1);

\end{tikzpicture}

\end{document}
- Amplitude option
We can also amplify the curves of the braces with amplitude option. When used with higher parameters, it will draw larger curves and the tip of the brace will be further away from its original position. In the following example, we set the amplitude to 5pt for both braces:
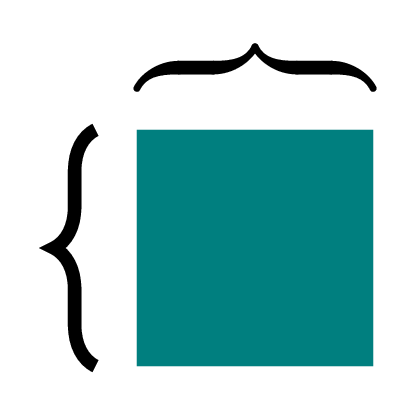
and the corresponding LaTeX code:
\documentclass[border = .2cm]{standalone}

% Required packages and libraries
\usepackage{tikz}
\usetikzlibrary{decorations.pathreplacing,calligraphy}

\begin{document}

\begin{tikzpicture}[ultra thick]

% Rectangle
\fill[teal] (0,0) rectangle (1,1);

% Simple brace
\draw [decorate,
	decoration = {brace,
		raise=5pt,
		amplitude=5pt}] (0,0) --  (0,1);

% Calligraphic brace
\draw [decorate,
	decoration = {calligraphic brace,
		raise=5pt,
		amplitude=5pt}] (0,1) --  (1,1);

\end{tikzpicture}

\end{document}
How to change curly braces color?
For the simple curly brace, we can change the color with the same manner as we do with drawing paths by draw=<color> or simply adding color name to the draw command.
For calligraphic brace, we need to add the option pen colour=<color> to the draw command. Here is an illustrative example:
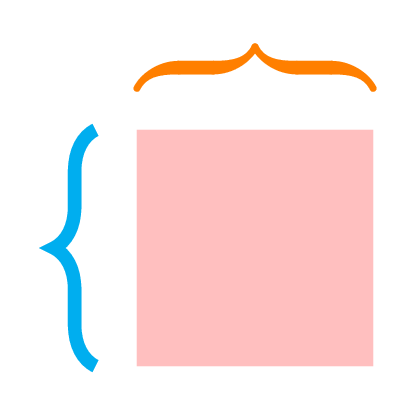
and its corresponding code:
\documentclass[border = .2cm]{standalone}

% Required packages and libraries
\usepackage{tikz}
\usetikzlibrary{decorations.pathreplacing,calligraphy}

\begin{document}

\begin{tikzpicture}[ultra thick]

% Pink rectangle
\fill[pink] (0,0) rectangle (1,1);

% Simple brace
\draw [cyan,
	decorate,
	decoration = {brace,
		raise=5pt,
		amplitude=5pt}] (0,0) --  (0,1);

% Calligraphic brace
\draw [pen colour={orange},
	decorate,
	decoration = {calligraphic brace,
		raise=5pt,
		amplitude=5pt}] (0,1) --  (1,1);

\end{tikzpicture}

\end{document}
How to add labels to curly braces ?
This can be achieved using node command with the following options:
- pos =<value>: takes values from 0 to 1 which sets the node position along the drawing path. 0 corresponds to the starting point and 1 corresponds to the end point. pos value has to meet aspect value if specified. Otherwise, we set it to pos=0.5.
- left=<value>, right=<value>, above=<value> or below=<value> : to position the label with respect to the braces. As the brace is raised and has an amplitude, the tip is far from the original path which forces us to add a value to the positioning operations.
Here is an example:
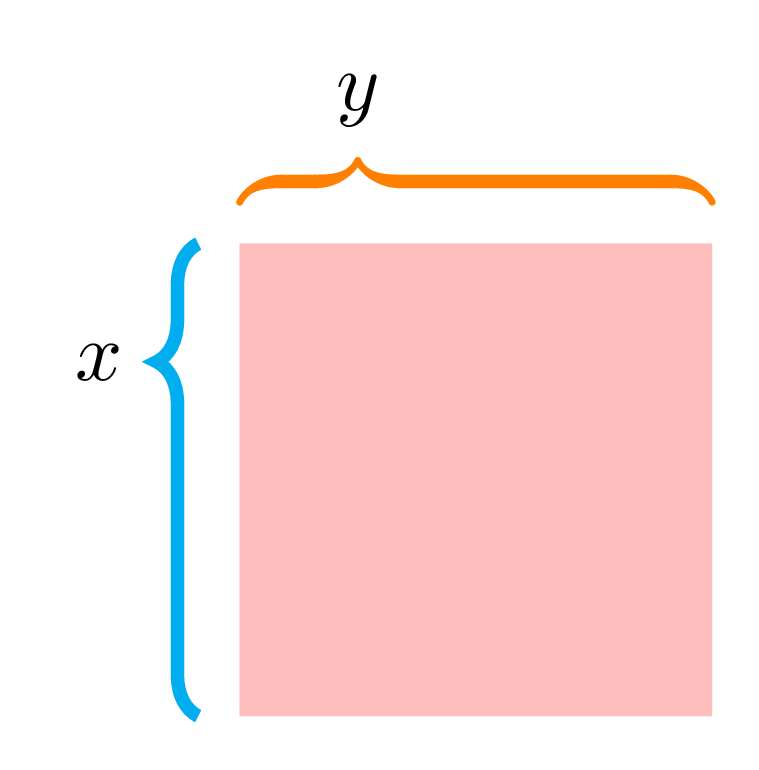
and its corresponding code:
\documentclass[border = .2cm]{standalone}

% Required packages and libraries
\usepackage{tikz}
\usetikzlibrary{decorations.pathreplacing,calligraphy}

\begin{document}

\begin{tikzpicture}[ultra thick]

% Pink rectangle
\fill[pink] (0,-1) rectangle (2,1);

% Simple brace
\draw [cyan,
	decorate,
	decoration = {brace,
		raise=5pt,
		amplitude=5pt,
		aspect=0.75}] (0,-1) --  (0,1)
node[pos=0.75,left=10pt,black]{$x$};

% Calligraphic brace
\draw [pen colour={orange},
	decorate,
	decoration = {calligraphic brace,
		raise=5pt,
		amplitude=5pt,
		aspect=0.25}] (0,1) --  (2,1)
node[pos=0.25,above=10pt,black]{$y$};

\end{tikzpicture}

\end{document}
Special thanks to Larry Dodd for his comments about the above codes 
