This tutorial is dedicated to solving a circular maze in TikZ 
Let's start by presenting the arc operation!

Arc operation (part of an Ellipse)
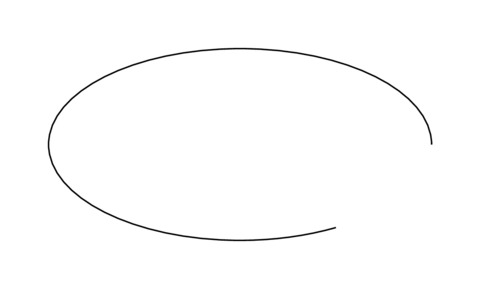
Drawing an arc in TikZ can be achieved by the arc opertaion which adds a part of an ellipse to the current path. Here is an example:
\documentclass[tikz,border=0.2cm]{standalone}

\begin{document}

\begin{tikzpicture}

% Arc operation
\draw (2,0) arc
	[
		start angle=0,
		end angle=300,
		x radius=2cm,
		y radius =1cm
	] ;

\end{tikzpicture}

\end{document}

The arc starts from the point (2,0) with 0 degree which is specified by the start angle and ends with 300 degrees which is set by the end angle.
Arc operation (part of a Circle)
To draw part of a circle, we use the same syntax as the previous one and instead of providing the parameters x-radius and y-radius, we provide only the parameter radius. Here is an example:
\documentclass[tikz,border=0.2cm]{standalone}

\begin{document}

\begin{tikzpicture}

\draw[fill=yellow!30] (0,0) -- (2,0) arc[start angle=0, end angle=60,radius=2cm] -- (0,0);

\draw[fill=cyan!30] (0,0) -- (0,1.5) arc [start angle=90, delta angle=30, radius=1.5cm] -- (0,0);

\draw[-latex] (120:0.5) arc (120:360:0.5) ;

\end{tikzpicture}

\end{document}

Comments:
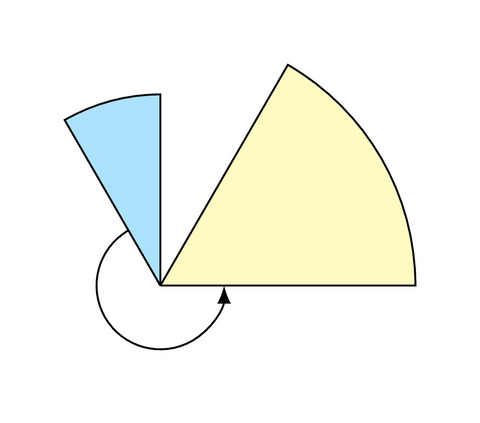
- The yellow sector is drawn by the arc operation and to get a part of a circle, we define only the radius instead of x radius and y radius parameters.
- The blue sector is drawn with the same manner as the yellow sector but in this case we have specified the delta angle instead of the end angle. The latter is equal to the start angle + delta angle.
Short Syntax of the Arc operation
The curved arrow in the previous illustration is drawn using a shorter syntax of the arc operation:
arc(start angle:end angle: radius)
which corresponds to a part of a circle. For an ellipse, we use the following syntax:
arc(start angle:end angle: x radius and y radius)
However, this syntax is not intuitive and harder to read, so the normal syntax should be preferred in general (PGF manual V.3.1.7.a, page 160).
Solving the maze!
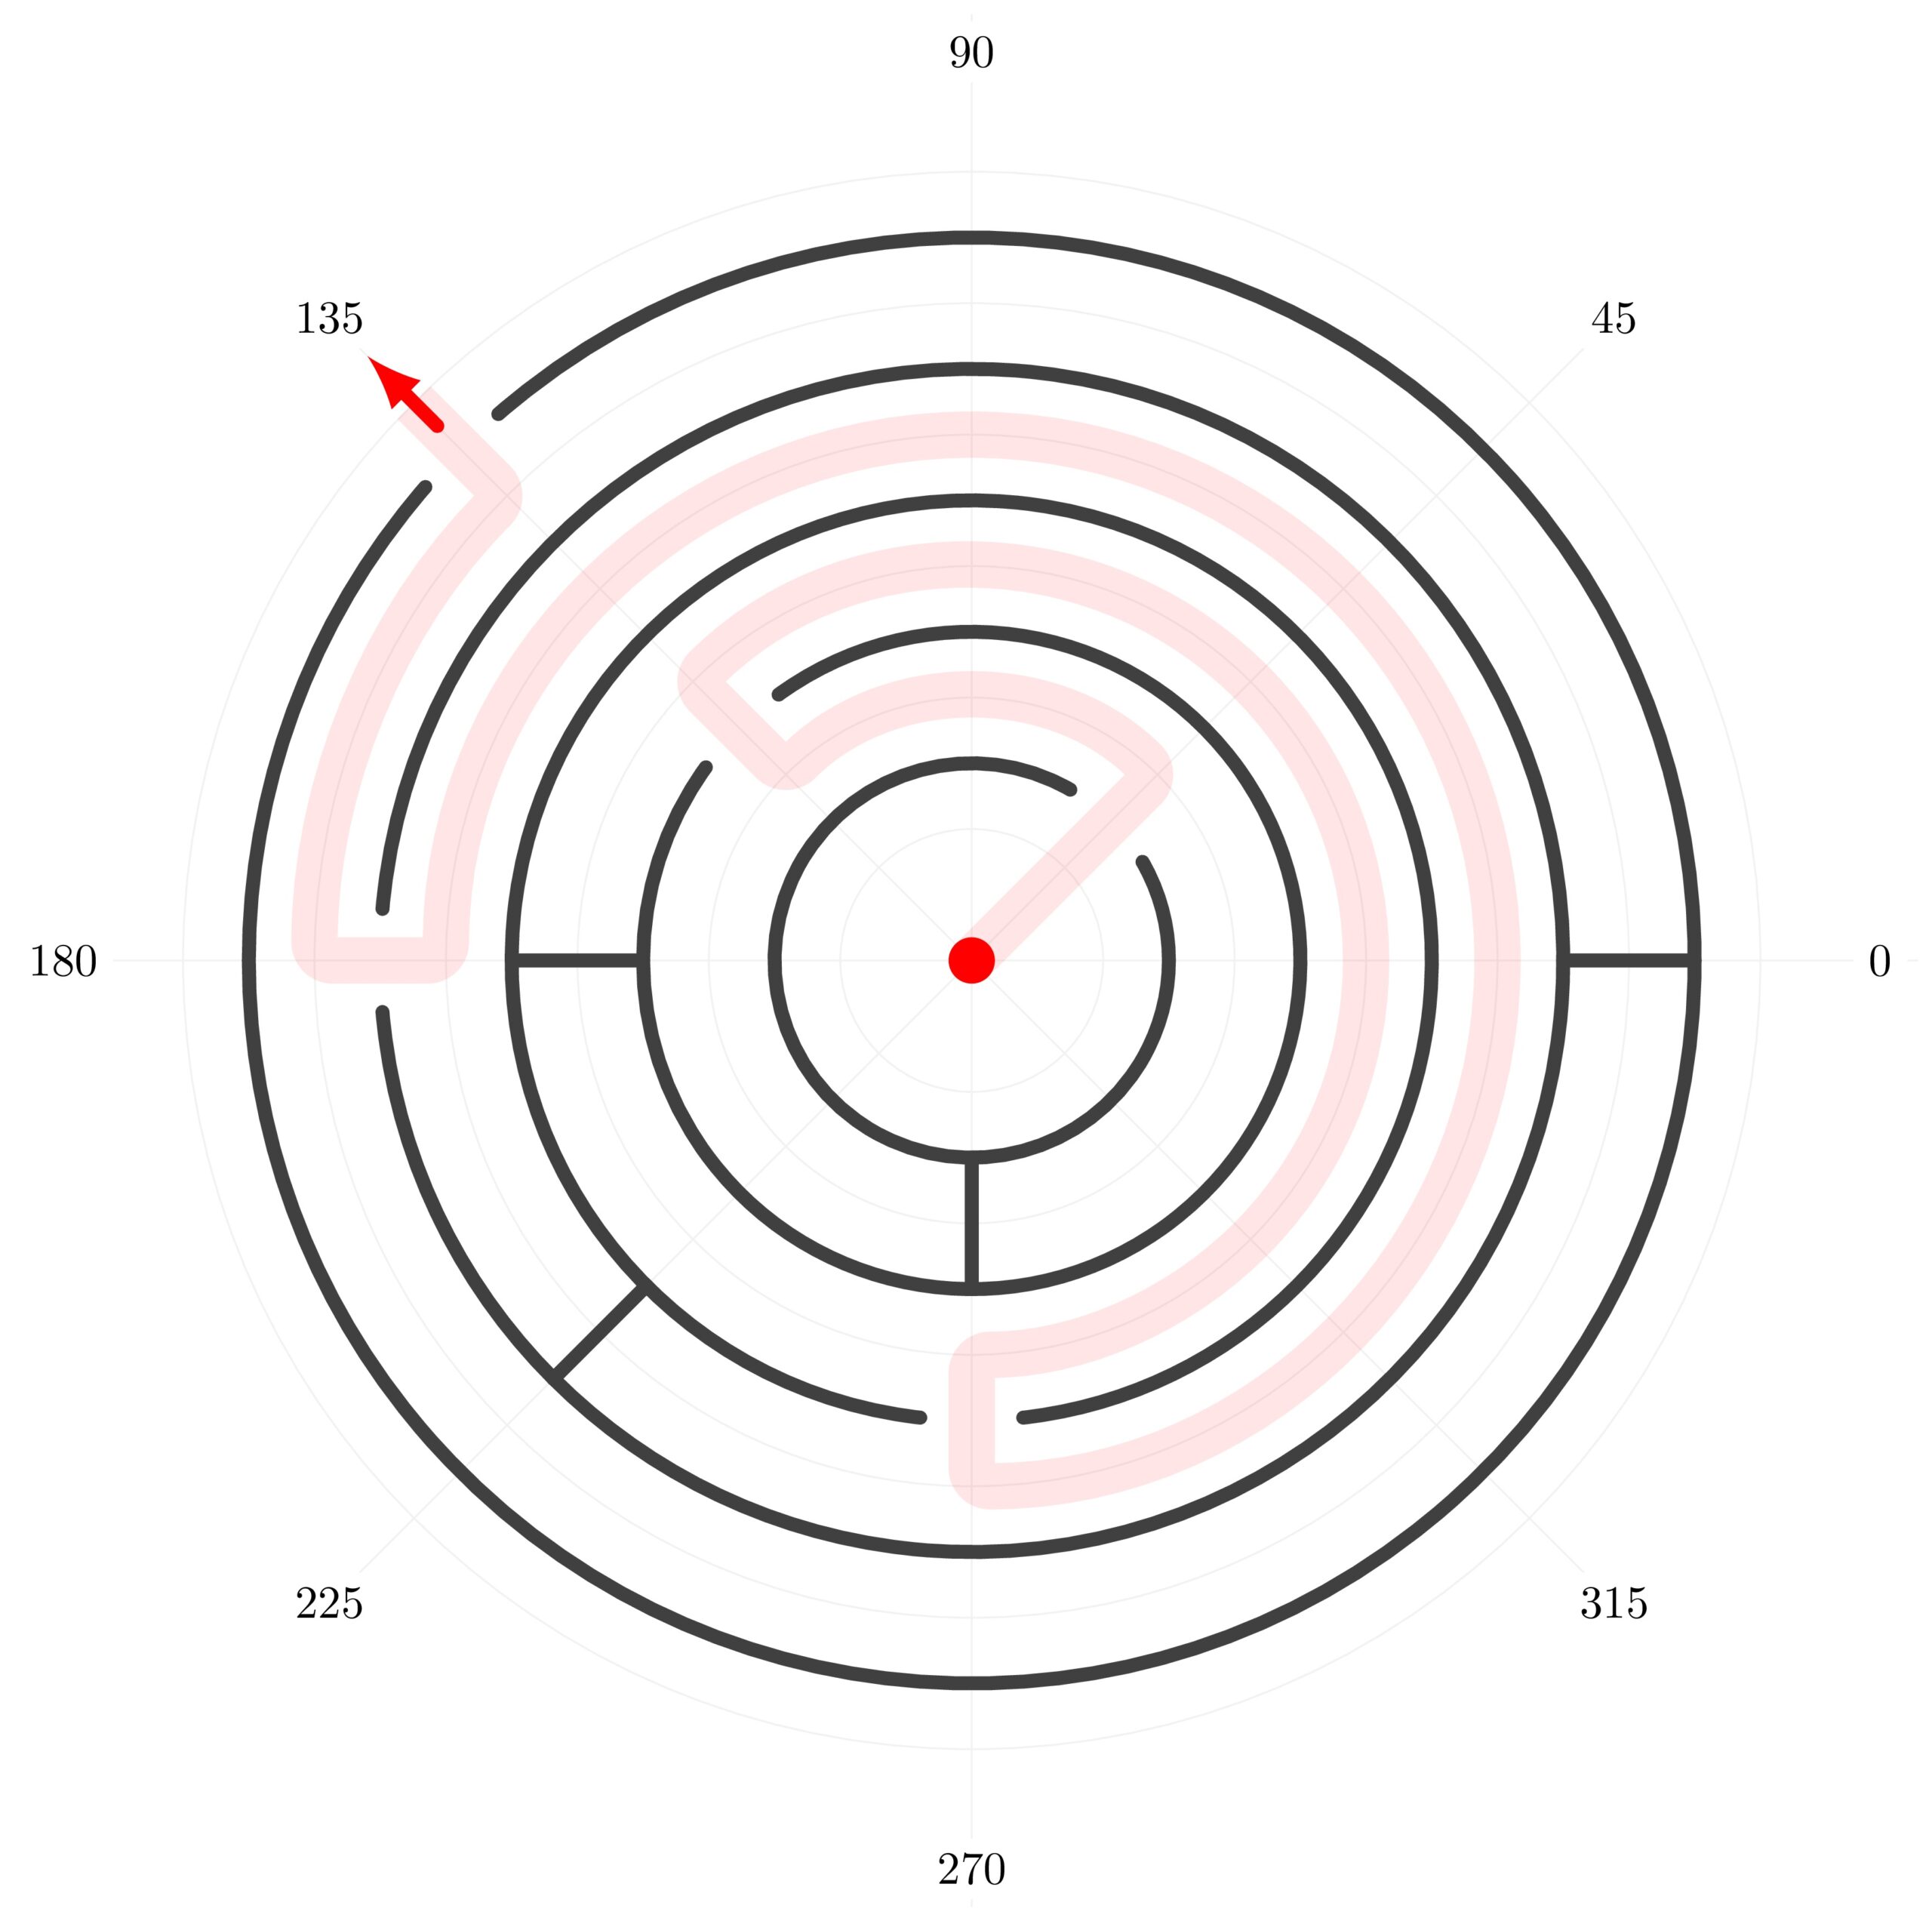
Could you solve the maze starting from (0,0) (center of the maze) and using the arc operation?
The solution has to be written after the comment %put here your code in the maze TeX code. Share with us your solution using the comment section below!

Starting from (0,0), we draw a straight line to the point with polar coordinates (45:2). From that point, we draw an arc with 45 degrees starting angle, 135 degrees end angle and radius of 2 cm. We used the short syntax of the arc operation in this case.
From the end point of the arc, we draw a straight line with polar coordinates (135:3). From there, we draw an arc with a starting angle equals to 135 degrees and an end angle equals to -90 degrees. We follow the same steps until we reach the point with coordinates (135:5.75).
Here is the corresponding TikZ code:
  \draw[red,
	line width=10pt,
	opacity=0.1,
	rounded corners
] (0,0) -- (45:2) arc (45:135:2)-- (135:3)
	arc(135:-90:3) -- (-90:4)
	arc(-90:180:4) -- (180:5)
	arc (180:135:5) -- (135:5.75);

Challenge accepted by Overleaf!
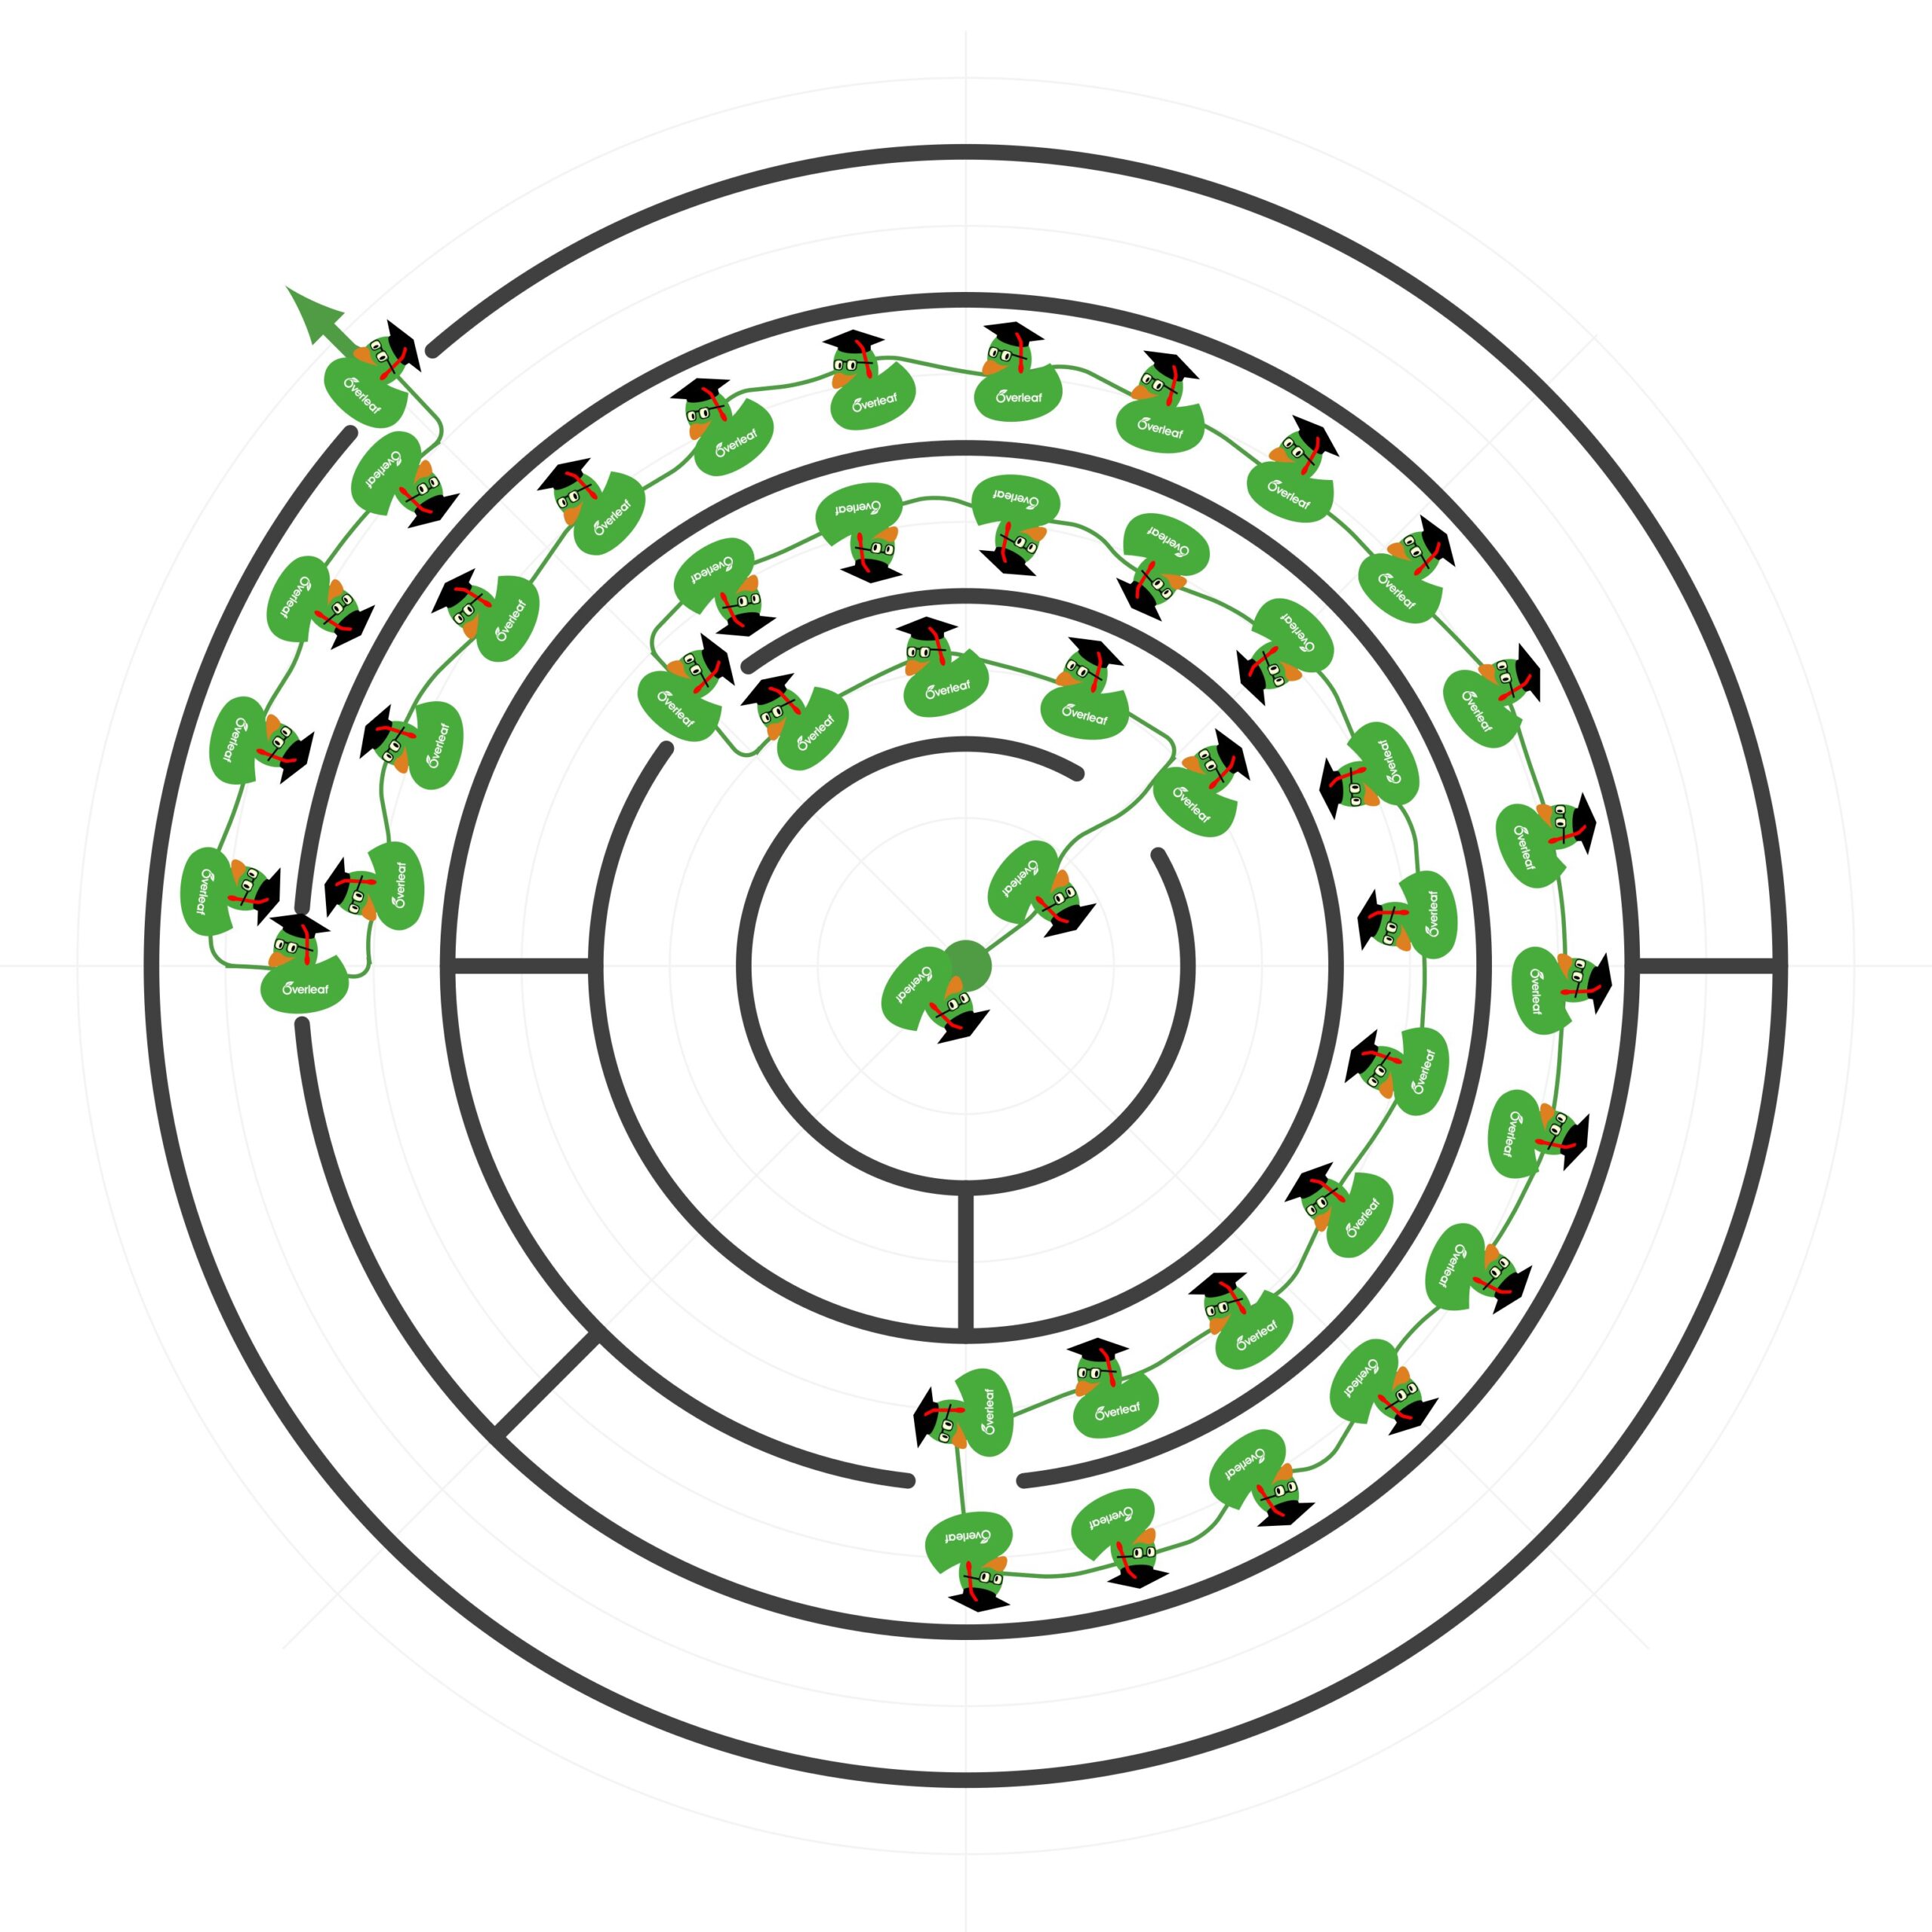
The challenge has been accepted by Overleaf and here is their solution:

\documentclass[border=0.5cm]{standalone}

\usepackage{tikz}

\usetikzlibrary{decorations.pathmorphing, decorations.markings, ducks}

\definecolor{OverleafGreen}{HTML}{4F9C45}

\begin{document}

\begin{tikzpicture}

% Load the puzzle
\input{Maze2}

% Put your code here
\tikzset{
	sol1/.style = {
		decorate,
		decoration = {
			random steps,
			segment length = 0.5cm,
			amplitude = 0.15cm
		},
		rounded corners = 0.15cm,
		color = OverleafGreen,
		thick,
	},
	sol2/.style = {
		decoration = {
			markings,
			mark = between positions 0 and 1 step 10.15mm
			with {\begin{scope}[
				rotate=180,
				xshift=-2mm,
				yshift=-3.5mm,
				scale=0.3]\duck[overleaf]\end{scope}
			},
		},
		postaction = {decorate},
	}
}

\draw[sol1] (0,0) -- (45:2)
	arc(45:135:2) -- (135:3)
	arc(135:-90:3) -- (-90:4)
	arc(-90:180:4) -- (180:5)
	arc(180:135:5) -- (135:6);

\path[sol2] (0,0) -- (45:2)
	arc(45:135:2) -- (135:3)
	arc(135:-90:3) -- (-90:4)
	arc(-90:180:4) -- (180:5)
	arc(180:135:5) -- (135:6);

\end{tikzpicture}

\end{document}
