Use standalone class...
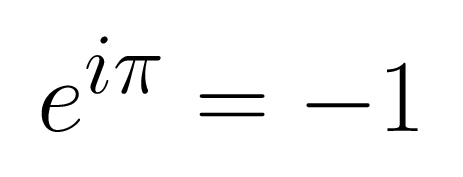
Most of the time, I use Overleaf (Online LaTeX editor) to draw my illustrations and I choose Standalone as a documentclass. This class allows us to get an output file that only contains the picture with no extra (or specified) white margins. Here is an example of an equation with 0.2cm white margin:
\documentclass[border=0.2cm]{standalone}

\usepackage{tikz}

\begin{document}

\begin{tikzpicture}
	\node at (0,0) {\Huge $e^{i\pi}=-1$};
\end{tikzpicture}

\end{document}

LaTeX equation converted to PNG
LaTeX to PNG
Converting LaTeX to PNG can be easily done in Overleaf as follows:
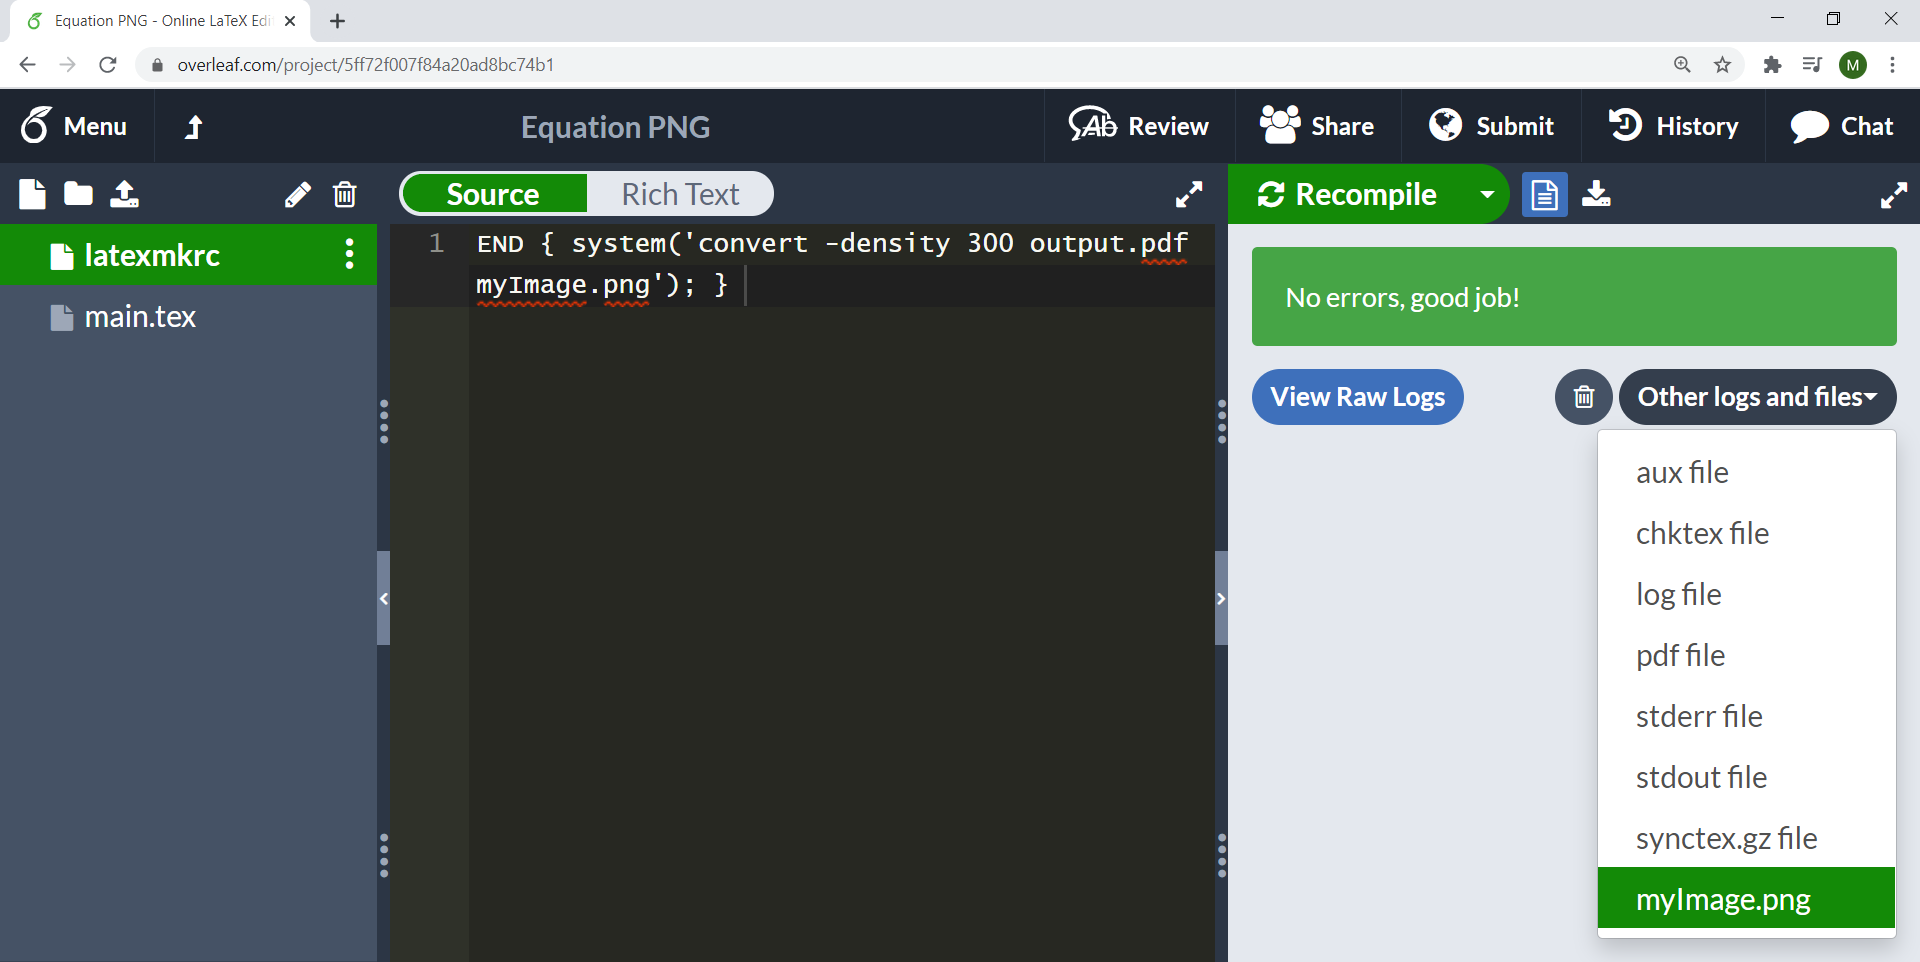
1. In the main folder, create a file and name it latexmkrc without extension
2. Write the following line code in the latexmkrc file:
END { system('convert -density 300 output.pdf myImage.png'); }
3. Compile your document
4. You get a png file in the tab logs and output files with the same name specified in the line code (myImage.png).
Let's go deeper!
The idea is to create a configuration file in Overleaf project that contains just a single line:
END { system('convert -density 300 output.pdf myImage.png'); }
The file is named latexmkrc as shown below:

After a successful compilation of the main LaTeX file, we get a png file in the tab logs and output files with the same name specified in the line code (myImage.png).

The line command calls a Perl function system(...) which excutes a program called convert. The latter does the conversion of the pdf file (output.pdf) at 300 dpi (specified using -density 300) to a PNG file with the chosen name myImage.png.
In this post, we will highlight some useful options and the reader may refer to ImageMagick's online help for a complete version.
Resize the generated image file
In order to change the size of the generated image file, we can add -resize as follows:
END {system('convert -density 600 -resize 20% output.pdf myImage.png');}
This will produce an image with a size 20% of the original image and at 600 dpi.

20% of the original image

Original image
Change the background color
By default, the generated image has a transparent background. In order to change its color (for example to yellow), we add -background yellow -flatten to the previous line code:
END { system('convert -density 600 -background yellow -flatten output.pdf myImage.png');}

Converted LaTeX file to PNG with yellow background

Converted LaTeX file to PNG with cyan background
How to export a JPEG image from LaTeX
This can be done by changing the name of the image file from myImage.png to myImage.jpeg. That's all!
END {system('convert -density 600 -background yellow -flatten output.pdf myImage.jpeg'); }
Convert a specific page of a document to an Image
Until now, we have considered standalone class to export TikZ illustrations to an image instead of a PDF file.
Suppose we have a document with many pages and we would like to convert one page to an image. In this case, we modify output.pdf to output[numberOfPage].pdf.
Here is an example of exporting page 2 of the PDF document to a PNG image with a name page2:
END { system('convert -density 600 -background white -flatten output[2].pdf page2.png'); }


The very first sentence should say ‘I will teach’ 😉
Each time I start writing a tutorial, I learn something new. For that, I prefer to say ‘we will learn’ instead of ‘I will teach’ 😊.
Ah, there’s ‘we’ at the beginning, not ‘I’ – my mistake. And I agree, the best way to learn is to teach 🙂
Thanks 🙂