In the first part of this tutorial, we learned how the inner separation relates to the general node’s structure. Let’s delve a bit deeper into the arcane of the option.
The general structure of a node
For clarity keep in mind the general structure of a node:
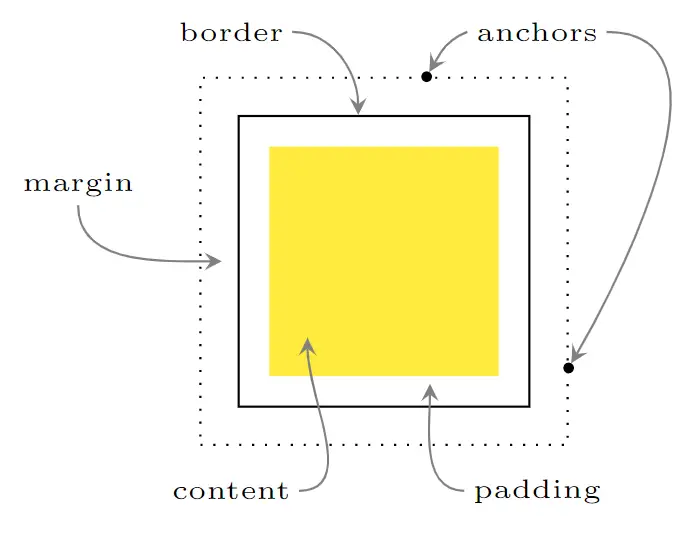
If you are familiar with CSS, you can see that nodes are built similarly to CSS objects. If you read the previous post, you must have noticed that what we called margin is now called padding. The reason is that I think it is better to have terminology which is consistent with the one that is already established. Hence, if you go back to the first part of the tutorial, you’ll see that I have changed ‘margin’ with ‘padding’ accordingly. I promise I will stick to this! The dotted line above could be called the limit of the node, and by default is located on its border (together with the anchors). You can influence it through outer sep option (its default value is 0pt). For now, let me get back to the inner separation and its features.
Inner separations
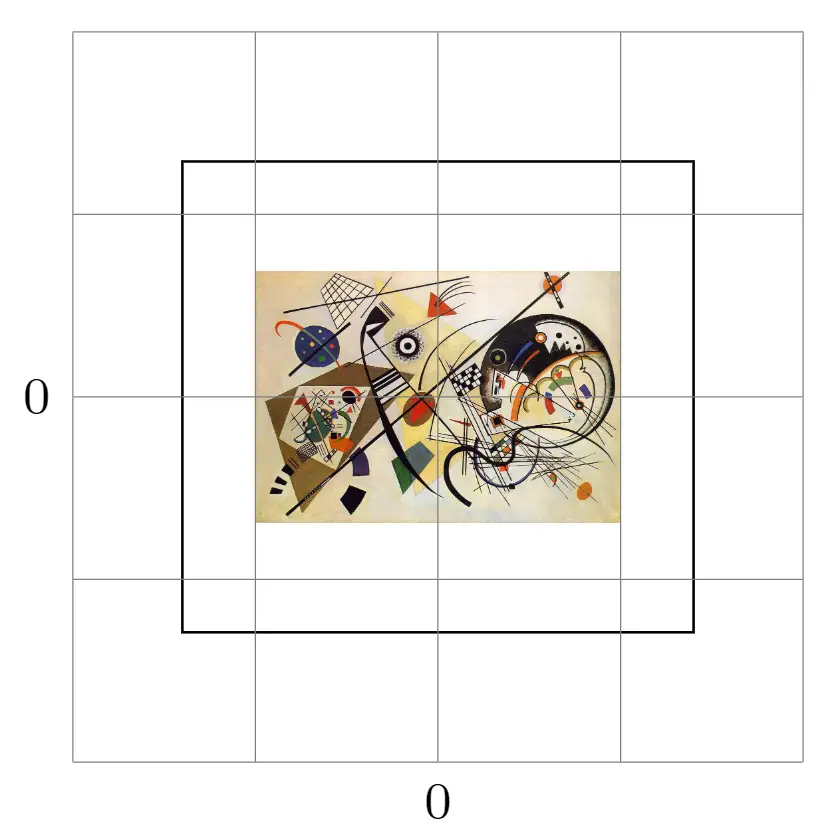
Remember that a node does not have to be square-like or rectangular, that its border is usually invisible, and that padding is what you tinker with by through inner sep option. The option as used in the examples from the first part of the tutorial influences all paddings. Yet in situations in which you may want to change top-bottom and left-right paddings of the node independently inner xsep and inner ysep come in handy:
\node[draw,inner xsep = 4mm,inner ysep=6mm] at (0,0)
              {\includegraphics[width=2cm]{kandinsky.jpg}};
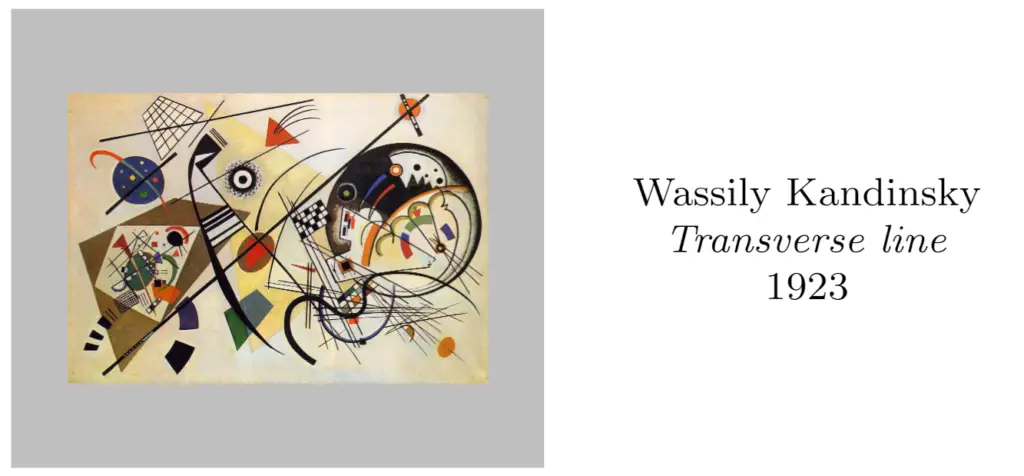
You may want to use the options for, e.g., putting a painting onto a background, and take the advantage of nodes’ positioning library (plus some inner LaTeX trickery) to add a description:
\usetikzlibrary{positioning} %for relative positioning of nodes

\newlength{\kandinsky} %defines a new length
\settowidth{\kandinsky}{\footnotesize Wassily Kandinsky}
                       %set new length for the proper parbox width

\begin{tikzpicture}[node distance=0.5cm]
\node[fill=lightgray,inner xsep = 4mm,inner ysep=6mm]
       (K) at (0,0) {\includegraphics[width=3cm]{kandinsky.jpg}};
\node[right = {of K}]
       {\parbox{\kandinsky}{\footnotesize\centering Wassily Kandinsky\\
                  \textit{Transverse line}\\1923}};
\end{tikzpicture}
Inner separation and circular nodes
Seemingly surprising results may occur when you use both circular nodes and the inner sep option. If you draw a default shape empty node with inner separation set to 1cm:
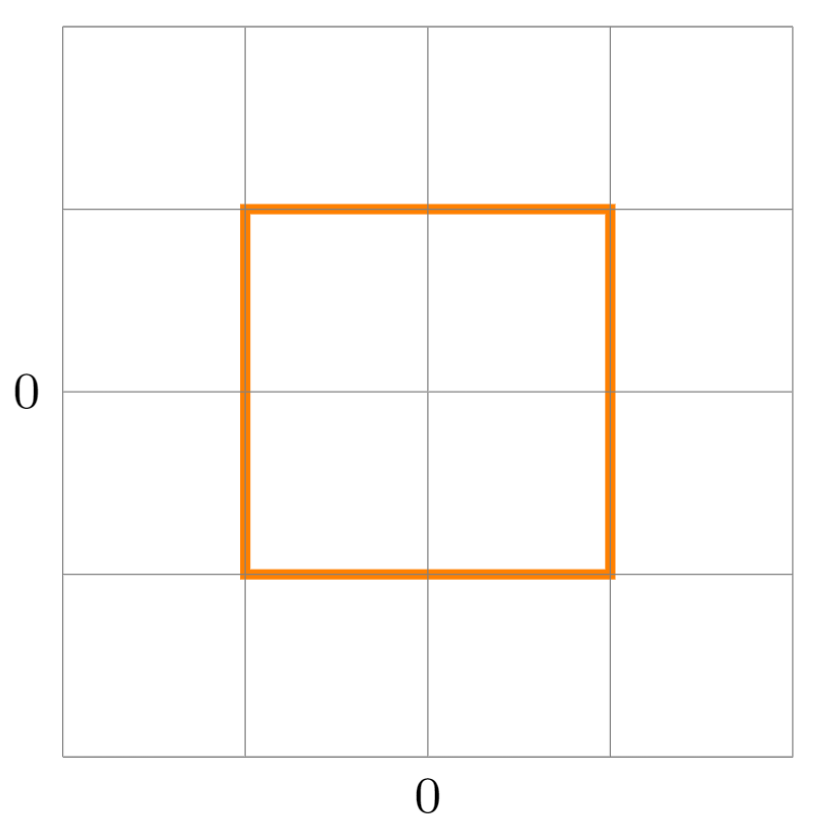
\node[draw=orange,ultra thick,inner sep=1cm] at (0,0) {};
you’re going to see a square with 2cm sides:
Yet when you change the node’s shape to circular, or for the sake of comparison, add another circular shape to the picture:
\node[draw=orange,ultra thick,inner sep=1cm] at (0,0) {};
\node[circle,draw=cyan,ultra thick,inner sep=1cm] at (0,0) {};
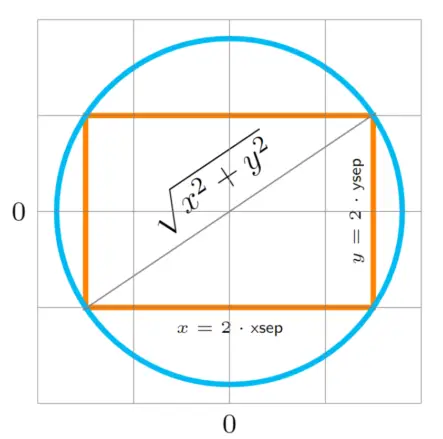
you won’t see a circle whose radius is 1cm, but the one whose radius is the square root of 2:

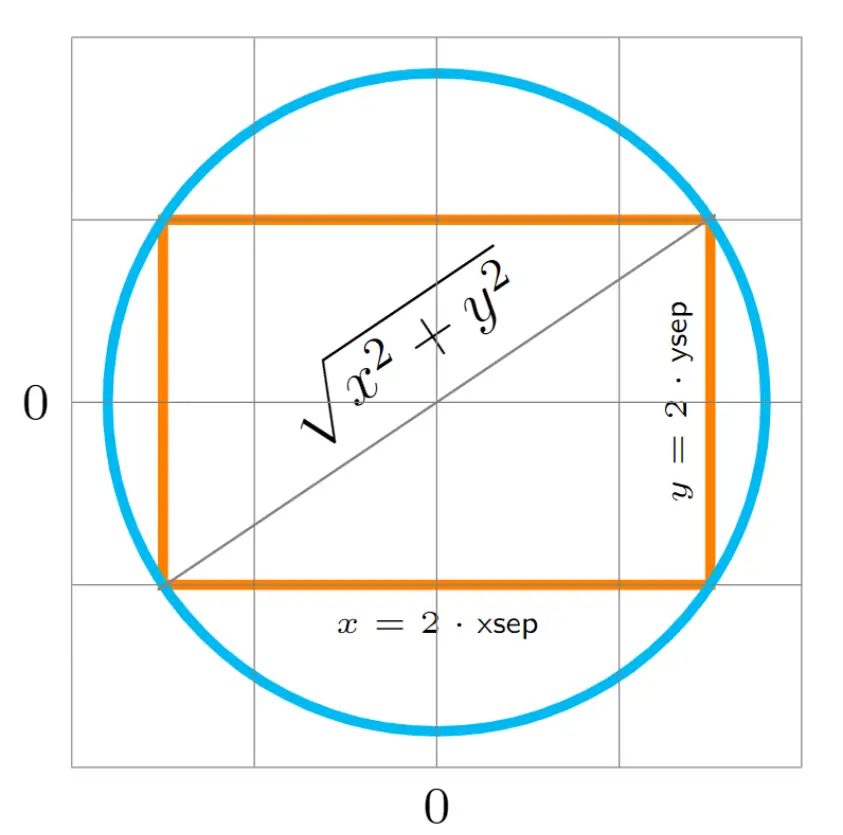
The reason is that the mechanism behind drawing node shapes works as follows: first create a default rectangular node, then circumscribe the desired shape on the rectangle. Thus, the Pythagorean theorem will tell you what is the diameter of the circular node:
\node[draw=orange,ultra thick,inner xsep=1.5cm,inner ysep=1cm]
                at (0,0) {};
\node[circle,draw=cyan,ultra thick,inner xsep=1.5cm,inner ysep=1cm]
                at (0,0) {};
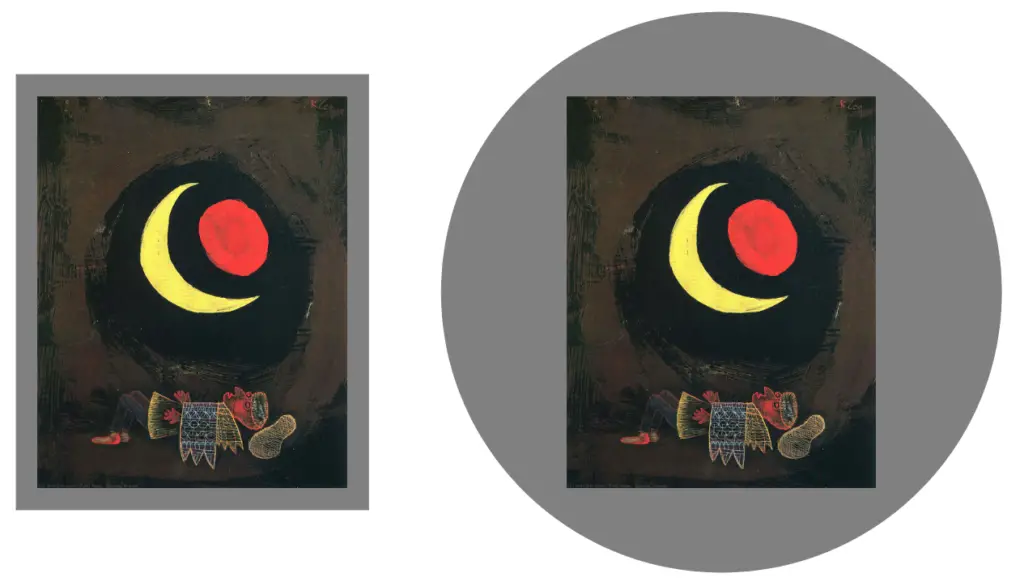
For comparison, below there is the same image located on two different backgrounds introduced using nodes and inner separation. The only difference is that the left version is put as a rectangular node, the right one as a circular one. The inner separation values for both are the same.
\usetikzlibrary{positioning}

\begin{tikzpicture}
\node[inner sep=5pt,fill=gray]
  (SD) at (0,0) {\includegraphics[width=2.5cm]{klee-strong-dream.png}};
\node[inner sep=5pt,fill=gray,circle,right={of SD},xshift=1cm]
   at (0,0) {\includegraphics[width=2.5cm]{klee-strong-dream.png}};
\end{tikzpicture}
public domain
We’ve reached the end of this tutorial. If you have any questions or suggestions feel free to reach me via email at admin@latexdraw.com.