if you ask any TikZ user about how to draw this illustration, you may get different responses. Some of them are optimized (small codes) and some of them are complex to follow. This mainly returns to the user experience and his geometry skills and imagination.
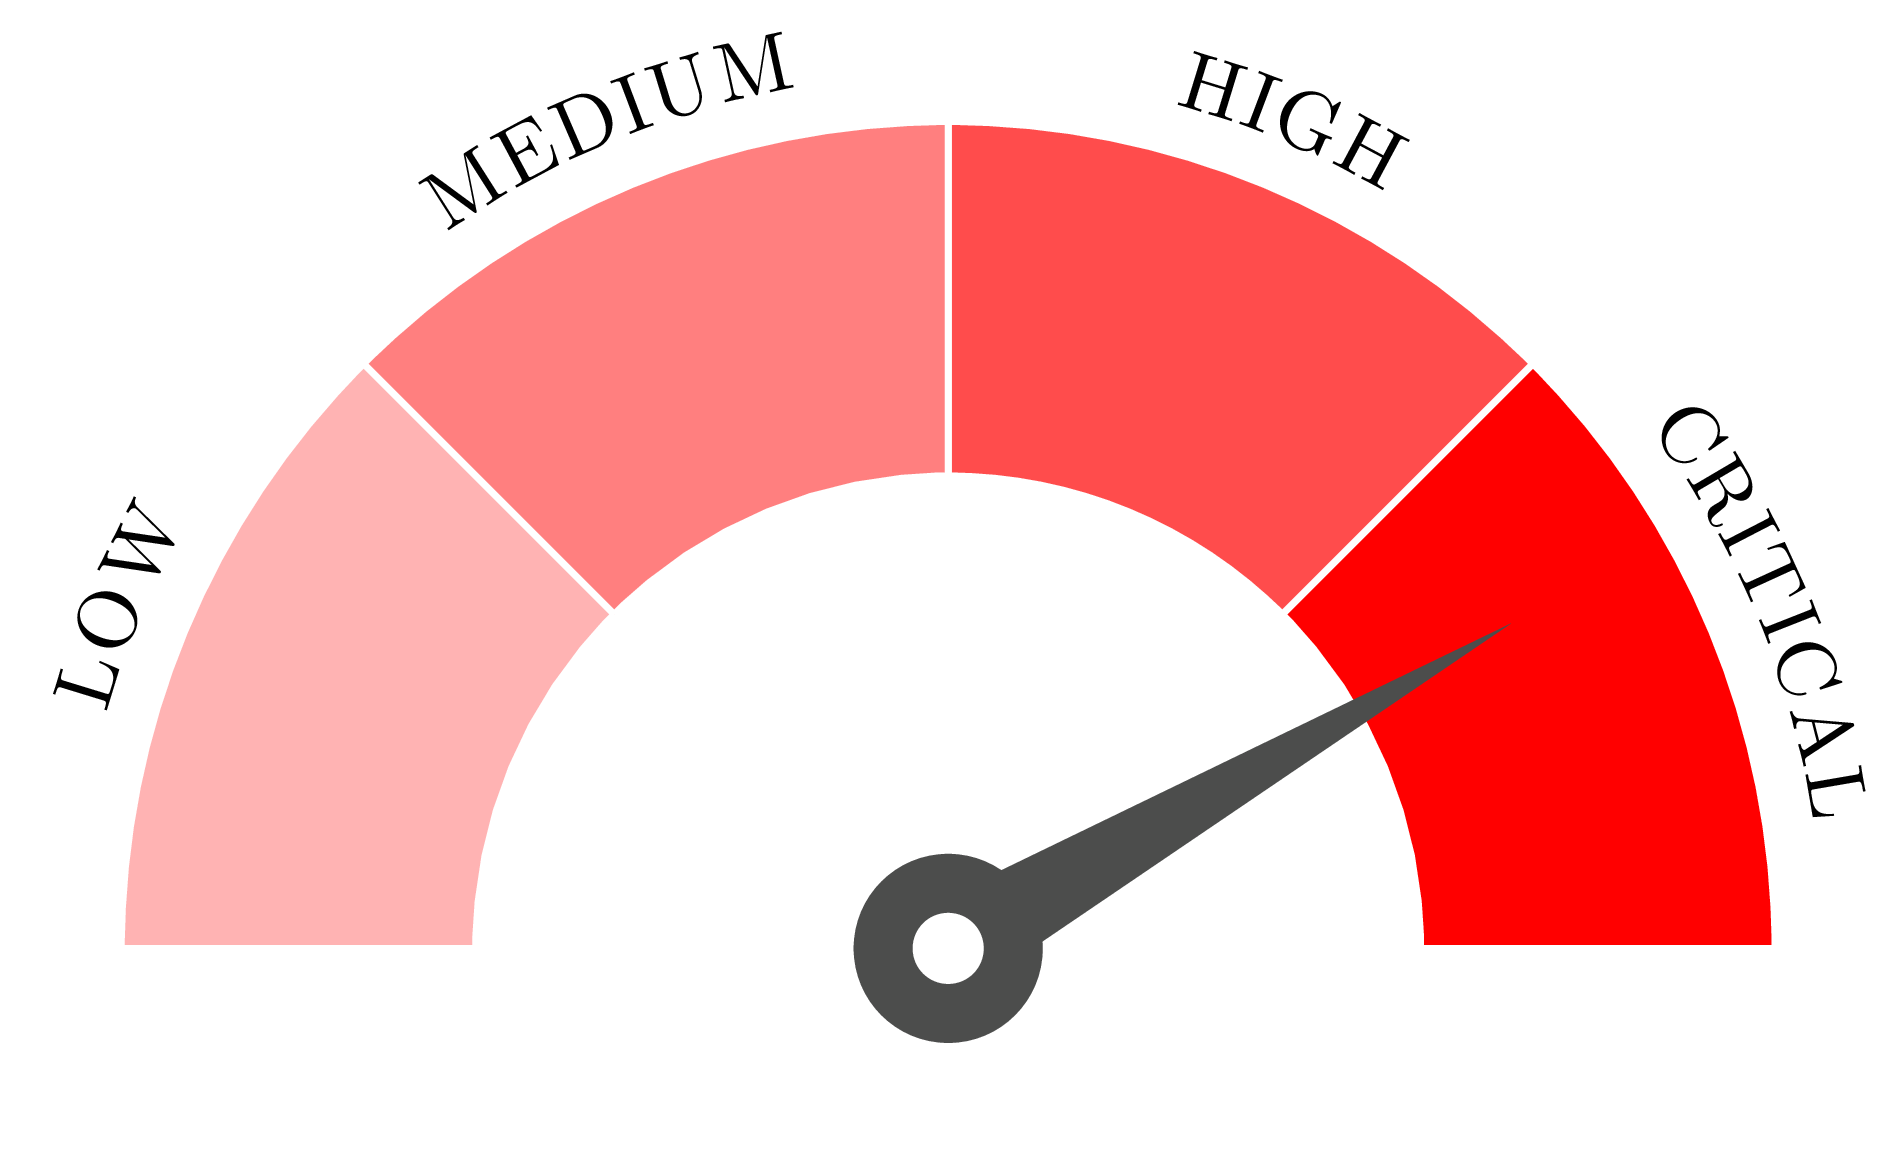
The speedometer illustration is made of the following ingredients:
- Arcs, circles and straight lines.
- The filling colour is red with different saturation values.
- Labels are with capital letters and follow the arc shape.
We can remark that circles and arcs (part of a big circle) have a center at the speedometer needle rotation center. We will choose this as the origin (0,0) and from there we draw different parts of the illustration. Let’s start by setting up the latex document!
What packages and libraries we need?
First of all, we need to upload the Tikz package together with a specialized library named decorations.texts for writing text along a path. The Tikz package is uploaded using the command \usepackage{tikz} and the library is uploaded using the command \usetikzlibrary{decorations.text}, check the initial code of the illustration.
\documentclass{standalone}

\usepackage{tikz}
\usetikzlibrary{decorations.text}

\begin{document}

\begin{tikzpicture}[]
	% Here goes the code
\end{tikzpicture}

\end{document}
How to draw an arc in TikZ?
Drawing an arc in TikZ can be done as follows:
\draw (x,y) arc (alpha:beta:radius);
where:
- (x,y) is the starting point of the arc in cartesian coordinate. Polar coordinates can be also used (theta:r)
- alpha and beta are starting and arriving angles in degrees.
- radius is the radius of the arc;
Example (critical region of the speedometer):
The next illustration shows different polar coordinates that we will use for the critical region path.
We distinguish two arcs both starting from the angle 0 degree and ending at the angle 45 degrees. The 45 degrees angle is obtained by dividing 180 degrees by the number of sectors.
These two arcs have different radii (2cm and 3.5cm). The following code shows how the critical region can be drawn (we use a thick white line for the border and red color for the shape filling).
\draw[draw=white,
			fill=red,thick] (0:2)--(0:3.5)
			arc(0:45:3.5)--(45:2) arc(45:0:2);
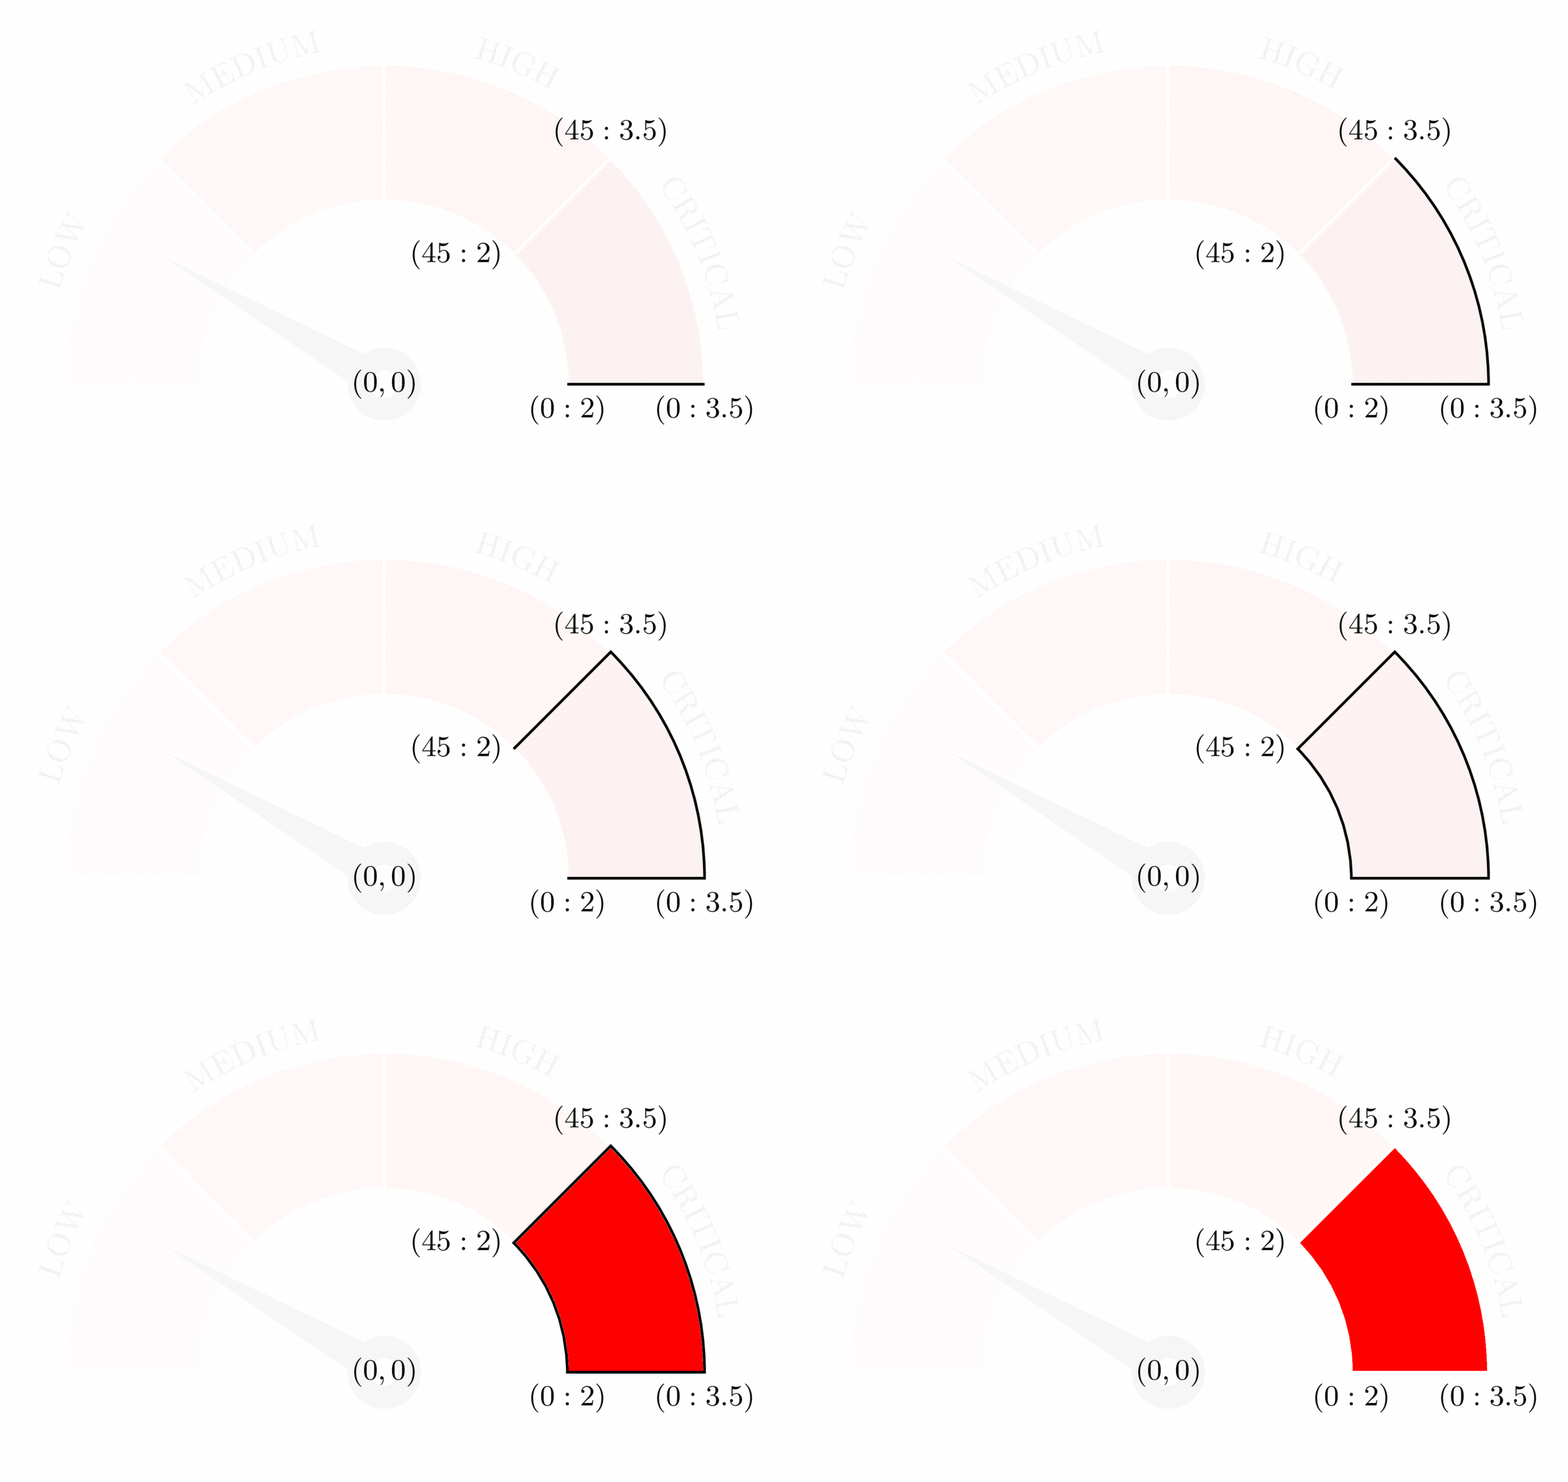
It starts from the polar coordinate (0:2) (radius 2cm and angle 0 degree) and it goes to the point (0:3.5). Then, from this point we draw an arc where the starting angle is 0 degree and the arriving angle is 45 degrees.
After that, we keep the same angle and we change the radius (from 3.5 cm to 2cm) to draw a straight line. Finally, we close the path by an arc starting from 45 degrees and it goes back to 0 degree defined with radius 2cm. Generally, we add -- cycle at the end of the path to close it perfectly.
Read this interesting post for more details about how to draw arcs using TikZ.
Add text along a path (arc)
\draw[decoration={
			text along path,
			text={CRITICAL},
			text align={center},
			raise=0.2cm},decorate] (45:3.5) arc (45:0:3.5);
We have aligned the text CRITICAL using the option text align={center} and we raised it a little by 0.2cm to avoid putting it on the path. This is achieved with the option raise=0.2cm. The obtained illustration is shown below with the caption “with reverse path option”. It should be noted that starting the path as follows:
\draw[decoration={
			text along path,
			text={CRITICAL},
			text align={center},
			raise=0.2cm},decorate] (0:3.5) arc (0:45:3.5);
yields to the illustration with inversed label. For that, we have started the arc from 0 degree to 45 degrees. Adding the option reverse path can do the job without inversing the path as follows:
\draw[decoration={
			text along path,
			text={CRITICAL},
			text align={center},
			raise=0.2cm,
			reverse path},decorate] (0:3.5) arc (0:45:3.5);
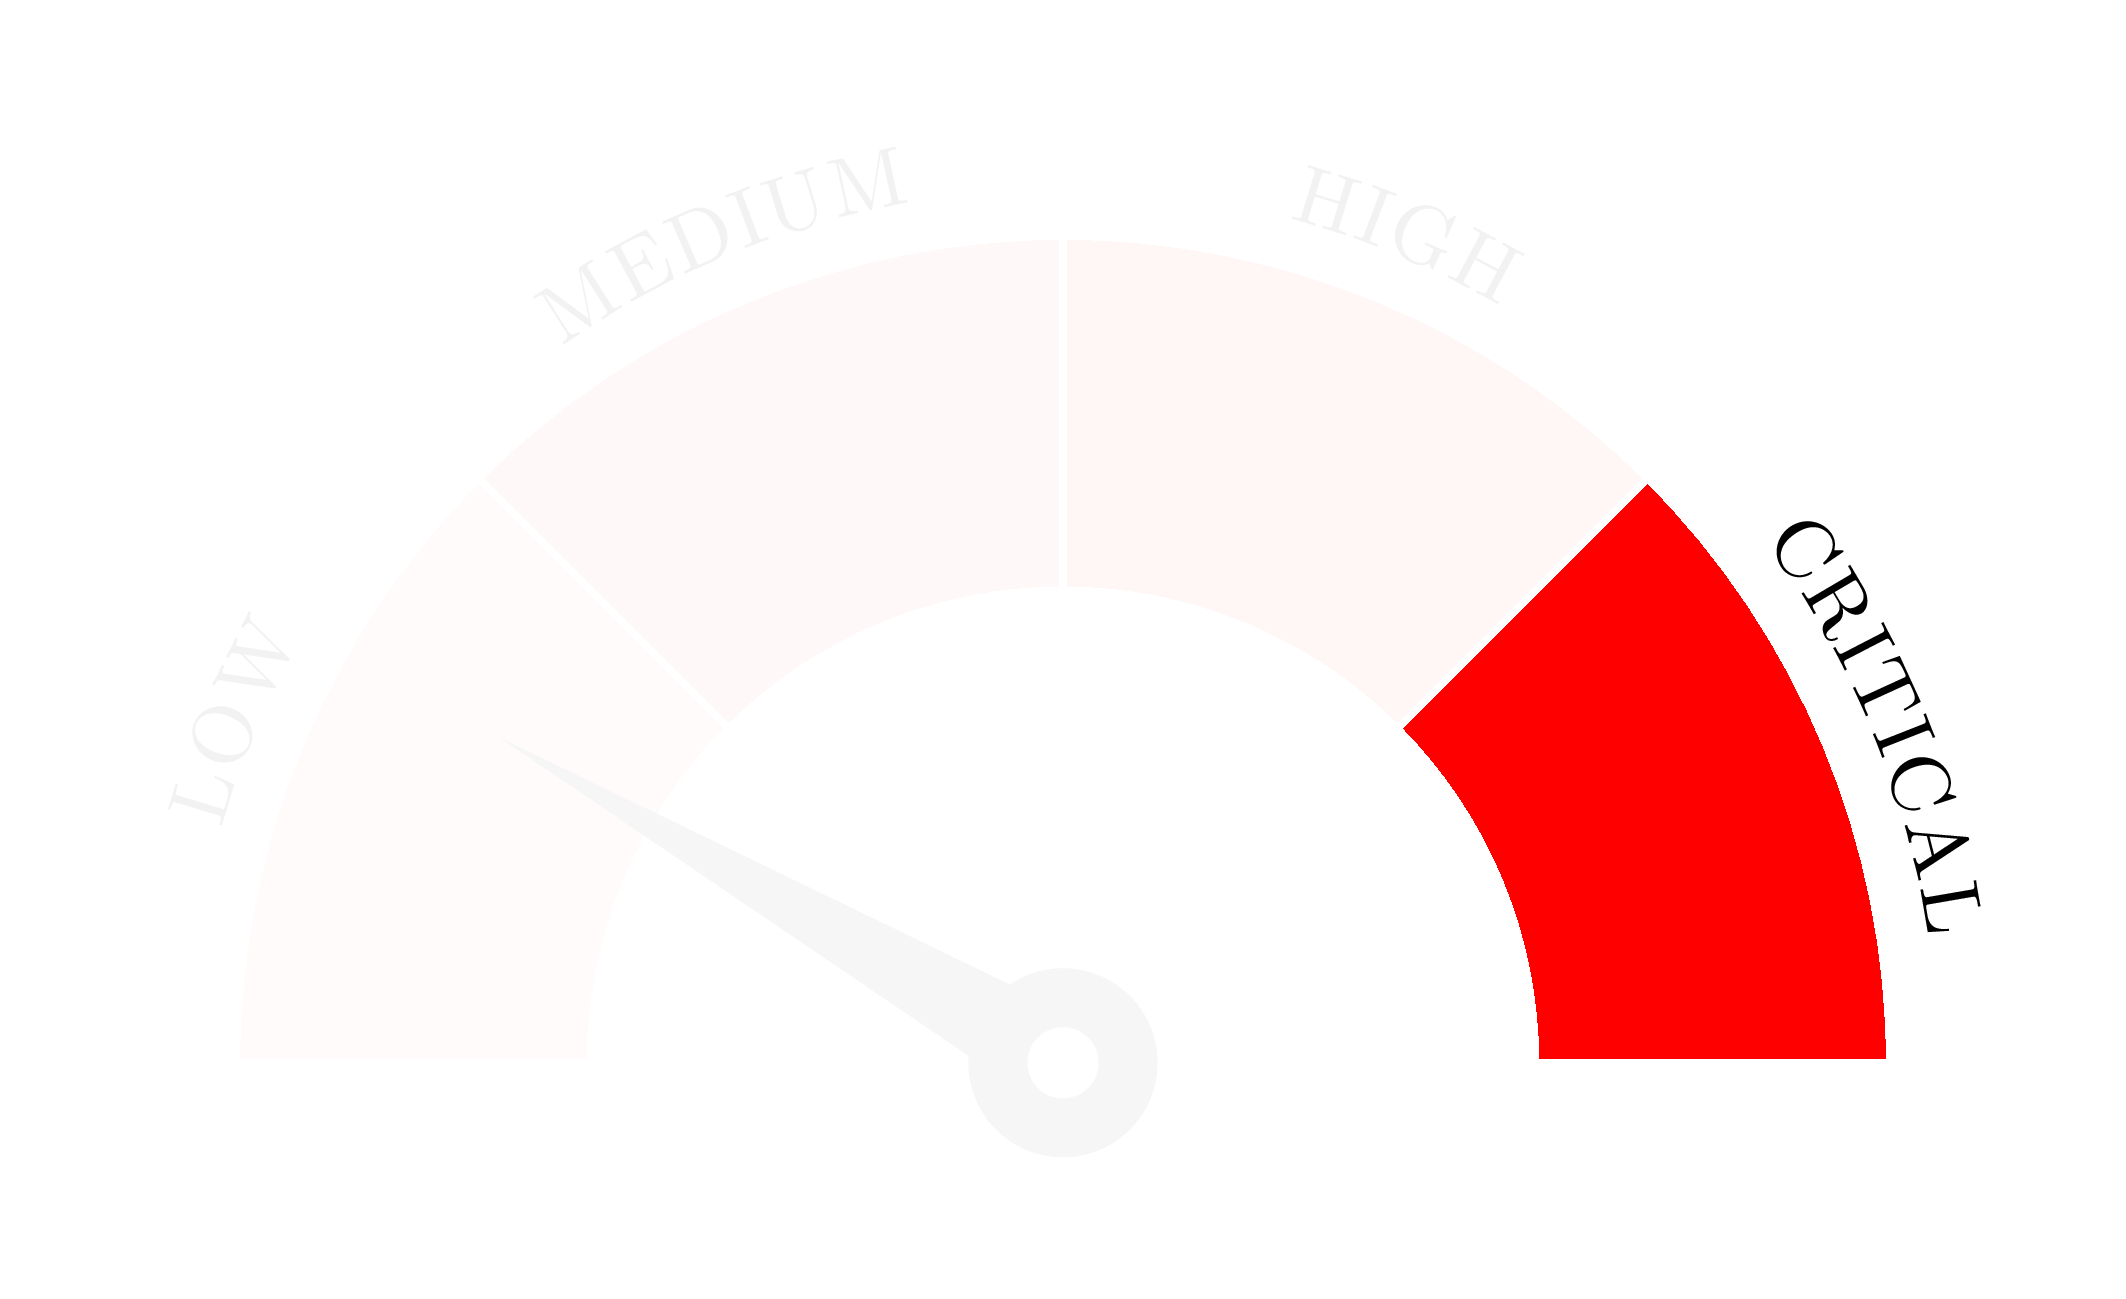
with "reverse path" option
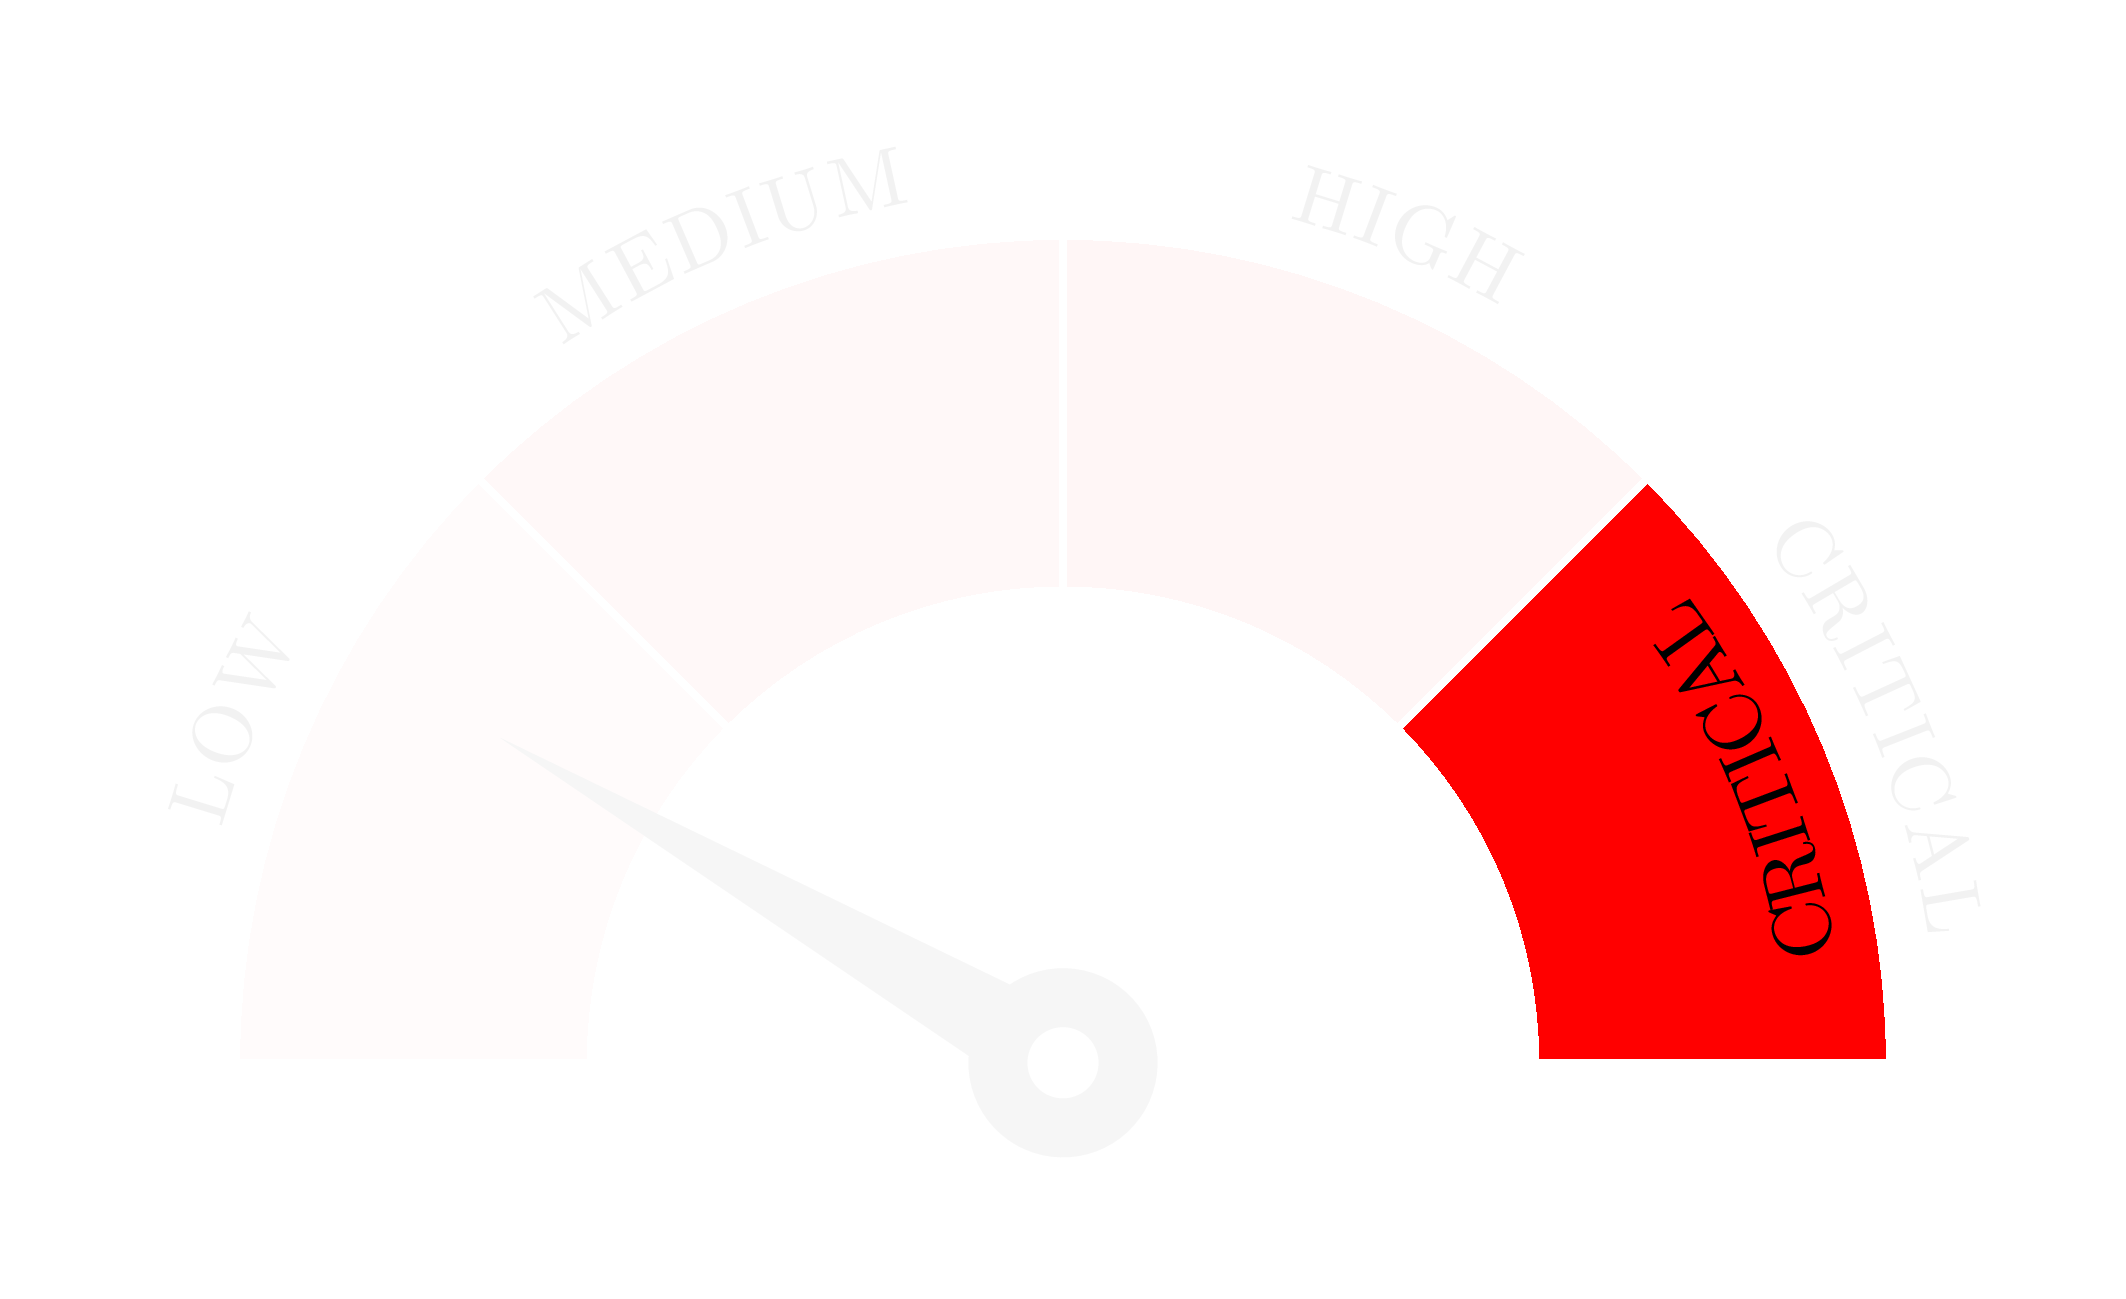
without "reverse path" option
How to rotate an object in TikZ
In this section, we will draw the speedometer needle. The basic idea is shown in the next animation where we draw a triangle and two circles (big one with black filling and small one with white filling). Drawing order has to be respected to get the final results. Here is the corresponding code:
% Triangle
\fill[black!70] (0,0.2)--(0:2.75) -- (0,-0.2)--cycle;

%Big circle
\fill [black!70](0,0) circle (0.4cm);

% Small circle
\fill [white](0,0) circle (0.15cm);
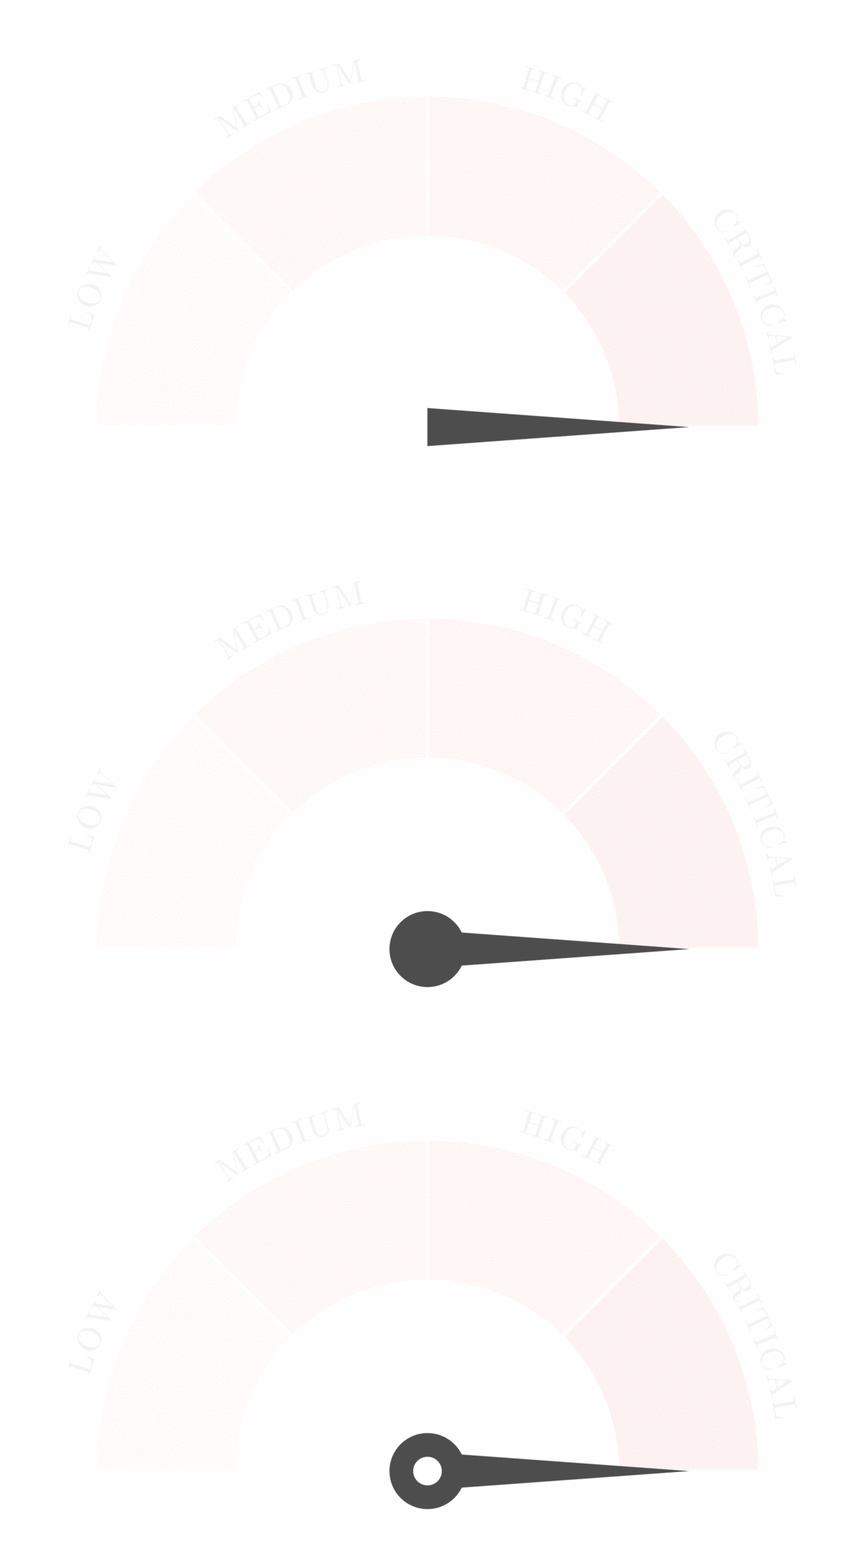
To rotate the speedometer needle, we can add the option rotate=value to the triangle draw code. The speedometer code is given below with all its parts.
\documentclass[border=0.5cm]{standalone}

\usepackage{tikz}
\usetikzlibrary{decorations.text}

\begin{document}

\begin{tikzpicture}[font=\small]
% Static part
\draw[draw=white,fill=red,thick] (0:2) -- (0:3.5) arc(0:45:3.5) -- (45:2) arc(45:0:2) -- cycle ;
\draw[draw=white,fill=red!70,thick] (90:2cm)-- (90:3.5cm) arc (90:45:3.5) -- (45:2cm) arc (45:90:2);
\draw[draw=white,fill=red!50,thick] (135:2cm)-- (135:3.5cm) arc (135:90:3.5) -- (90:2cm) arc (90:135:2);
\draw[draw=white,fill=red!30,thick] (135:2cm)-- (135:3.5cm) arc (135:180:3.5) -- (180:2cm) arc (180:135:2);


%Labels
\draw[decoration={
			text along path,
			text={LOW},
			text align={center},
			raise=0.2cm},
			decorate] (180:3.5cm) arc (180:135:3.5);

\draw[decoration={
			text along path,
			text={MEDIUM},
			text align={center},
			raise=0.2cm},
			decorate] (135:3.5cm) arc (135:90:3.5);

\draw[decoration={
			text along path,
			text={HIGH},
			text align={center},
			raise=0.2cm},
			decorate] (90:3.5cm) arc (90:45:3.5);

\draw[decoration={
			text along path,
			text={CRITICAL},
			text align={center},
			raise=0.2cm},
			decorate] (45:3.5cm) arc (45:0:3.5);

% Speedometer needle

\fill[black!70,rotate=145] (0,0.2)--(0:2.75) -- (0,-0.2)--cycle;
\fill [black!70](0,0) circle (0.4cm);
\fill [white](0,0) circle (0.15cm);

\end{tikzpicture}

\end{document}
You have reached the end of the tutorial 

At the beginning of the tutorial, where you describe the syntax of arc command, you write: “radius is not defined is the radius of the arc”, something’s definitely wrong here.
Hey Rafal,
“is not defined” corresponds to a coding issue due to removing one of plugins used to write in LaTeX in web pages.
Many thanks for your feedback 😊!
At the end of the code snippet in section Example (critical region of the speedometer), the part “–cycle” is missing.
–cycle is not necessary as the path ends at the starting point. You can add it to close it perfectly, check the quiz in https://latexdraw.com/tikz-quiz/, the second question addresses this point. Thanks Rafal!
Right! I messed things up as I thought that (0,3.5) is the starting point. However, in the picture below the code the first two points should be given as cartesian, not polar coordinates, shouldn’t they?
(0:3.5) is the same as (0,3.5)
I must have had a bad day 😉
😂 It happens!
I must have been really tired writing the comment 😀